Selling or Transferring a Vehicle
A vehicle changes hands and it needs to move to a different customer. OverDrive gives you two ways to do that, sitting right next to each other in the same menu — Sell Vehicle and Transfer Vehicle. They move the vehicle either way. What's different is what happens to the money.
Which one do I pick?
| The situation | Pick | What moves |
|---|---|---|
| The customer sold the vehicle to someone else | Sell Vehicle | The vehicle and its repair order history. The financial data stays with the original customer — the seller keeps their own payments. |
| The vehicle is on the wrong record, or moving between people on the same household account | Transfer Vehicle | Everything — the vehicle and all its history, including repair orders and payments. |
The difference is the money
For a genuine sale, use Sell Vehicle. Transfer Vehicle carries the previous owner's payment history onto the new customer's record — fine when you're correcting a record that was wrong all along, wrong when a stranger bought the car.
Either way, the new owner has to exist in OverDrive already. The picker only lists existing customers, so if the buyer is new, create their record first.
Getting there
Both start the same way: Customers → Vehicle List, open the vehicle, then click Options at the top right. The menu holds Vehicle History, Sell Vehicle, Transfer Vehicle and Print.
From there the two flows run the same shape — pick the new owner from a customer list, then confirm. Pick the tab for the one you're doing.
Use this when the customer sold the vehicle. The seller keeps their financial history; the new owner gets the vehicle and can see its repair order history. Step through the slides — click the chips at the top, the Previous / Next buttons, or use the ← → arrow keys.
Step 1 — Open Options. On the vehicle's record, click Options, then Sell Vehicle.
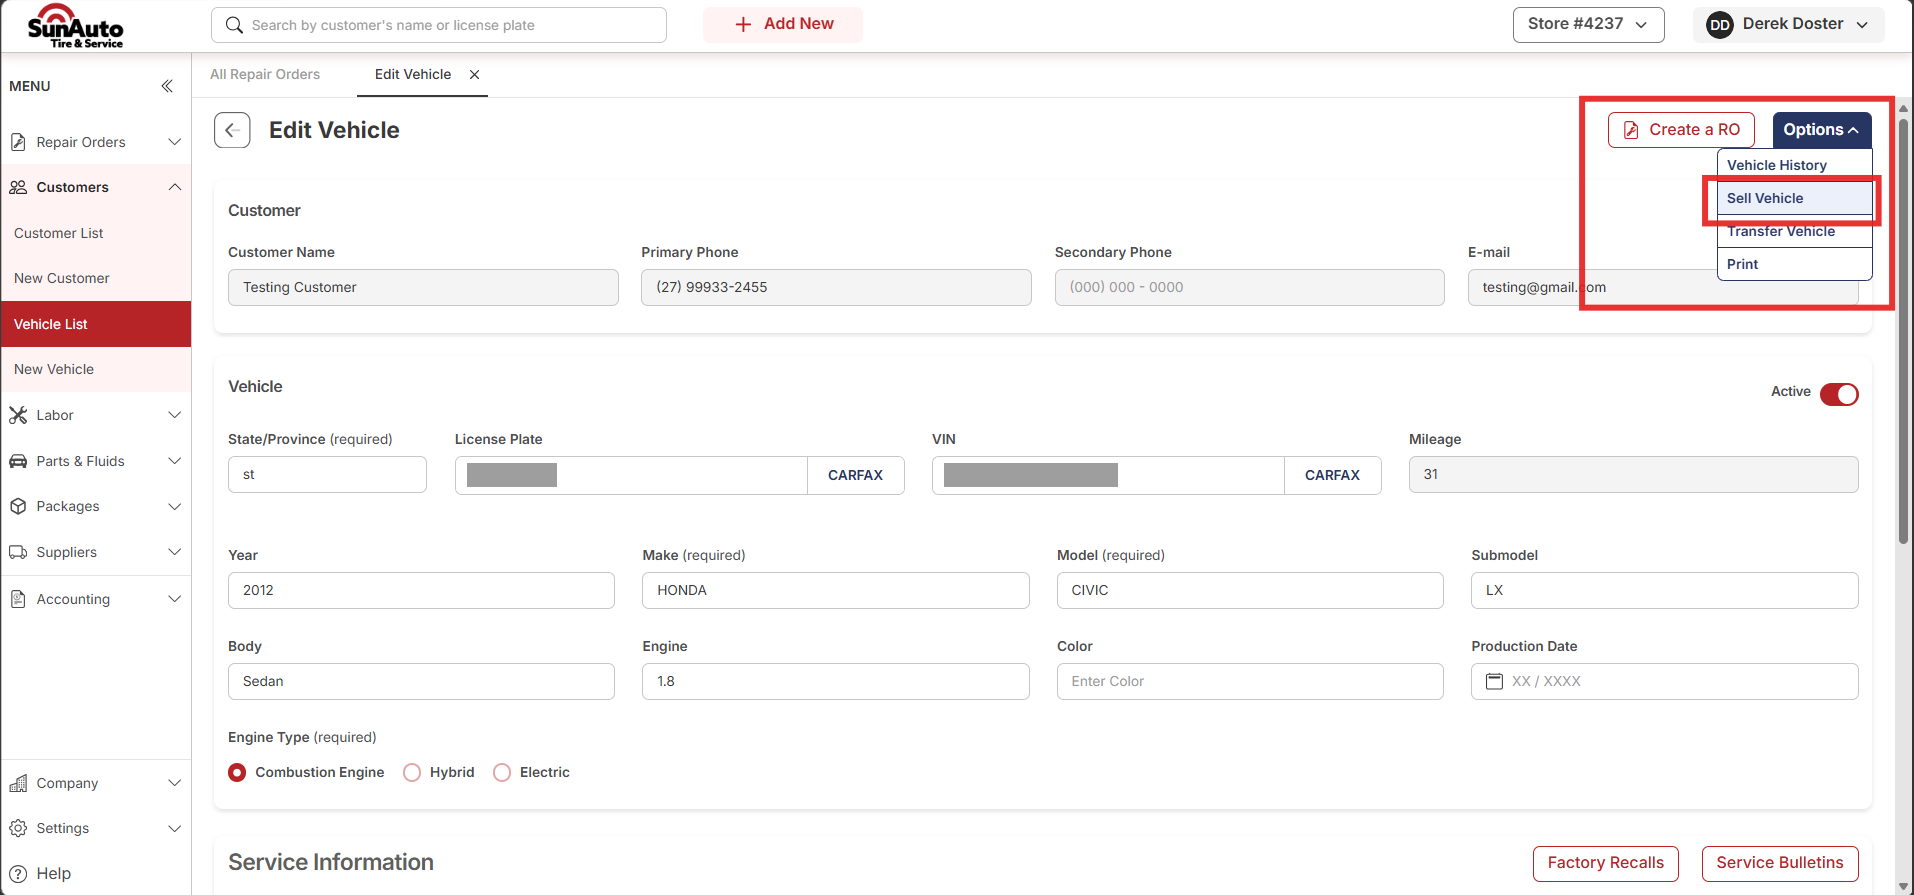 1Sell Vehicle — click to start the sale.
Step 2 — Find the new owner. A Sell Vehicle customer list opens. The current owner isn't in it, so you can't hand the vehicle back to them by mistake. Use Search to find the buyer.
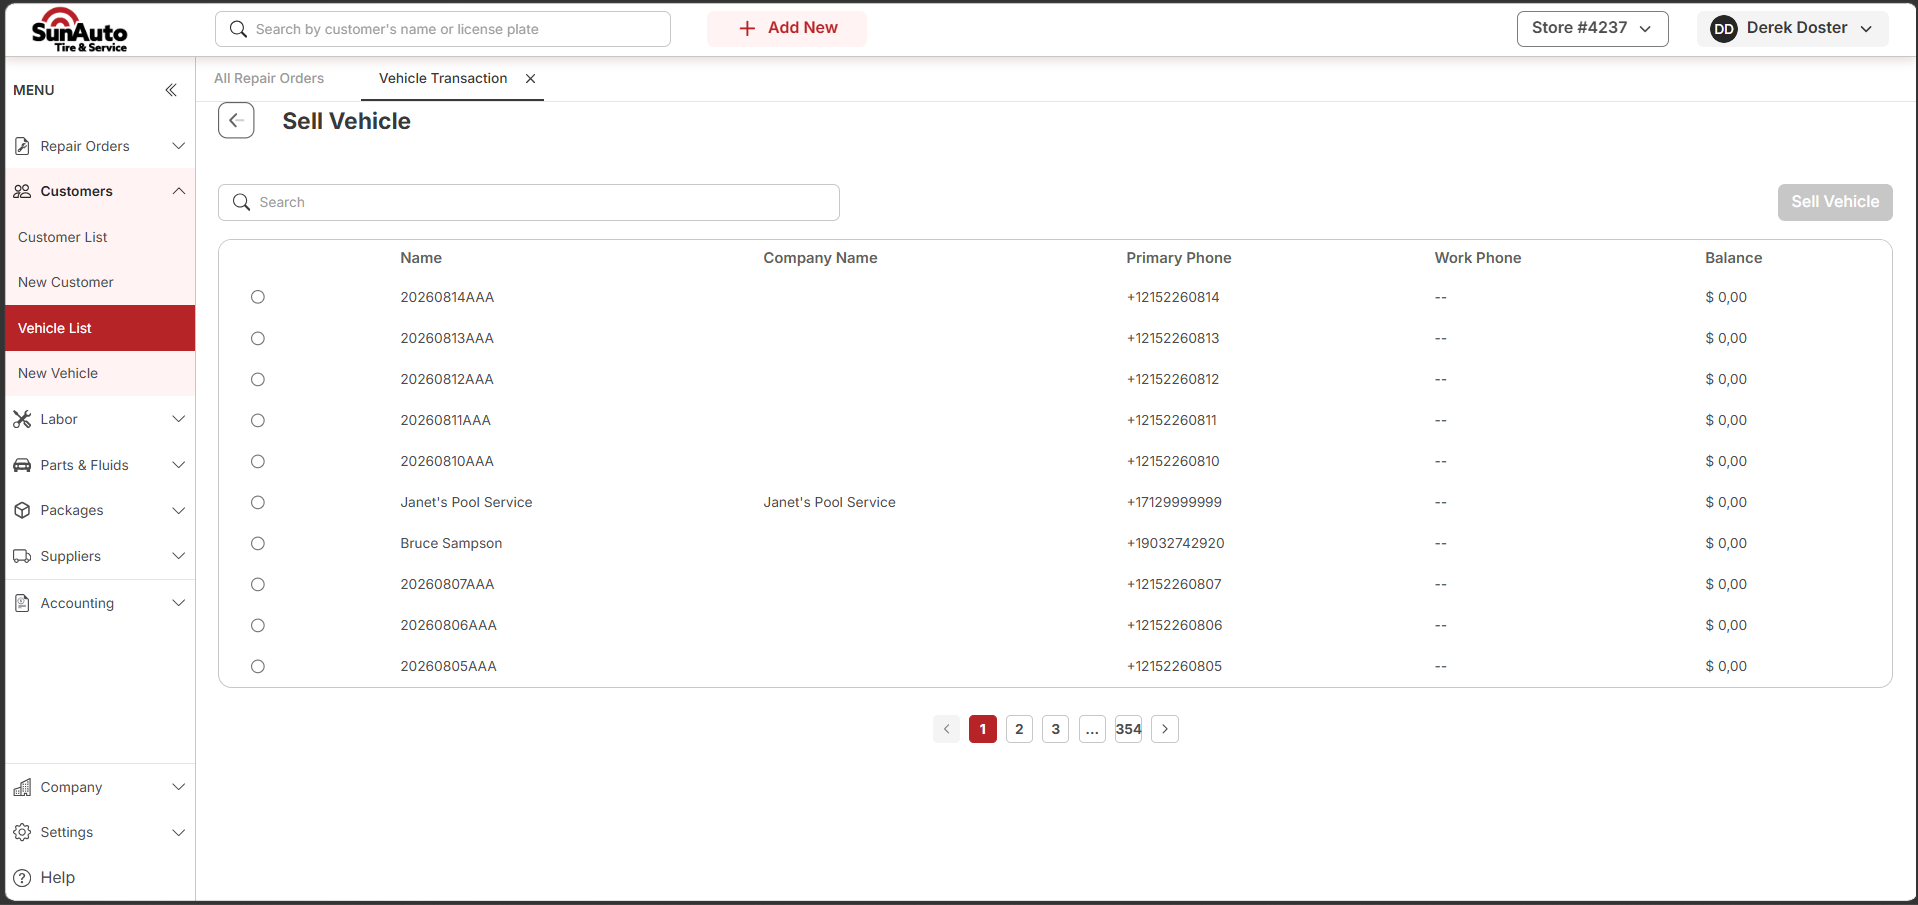 1Sell Vehicle — the heading confirms which action you're in.
Step 3 — Select them. Tick the buyer's row and the Sell Vehicle button turns on. It stays disabled until a customer is selected.
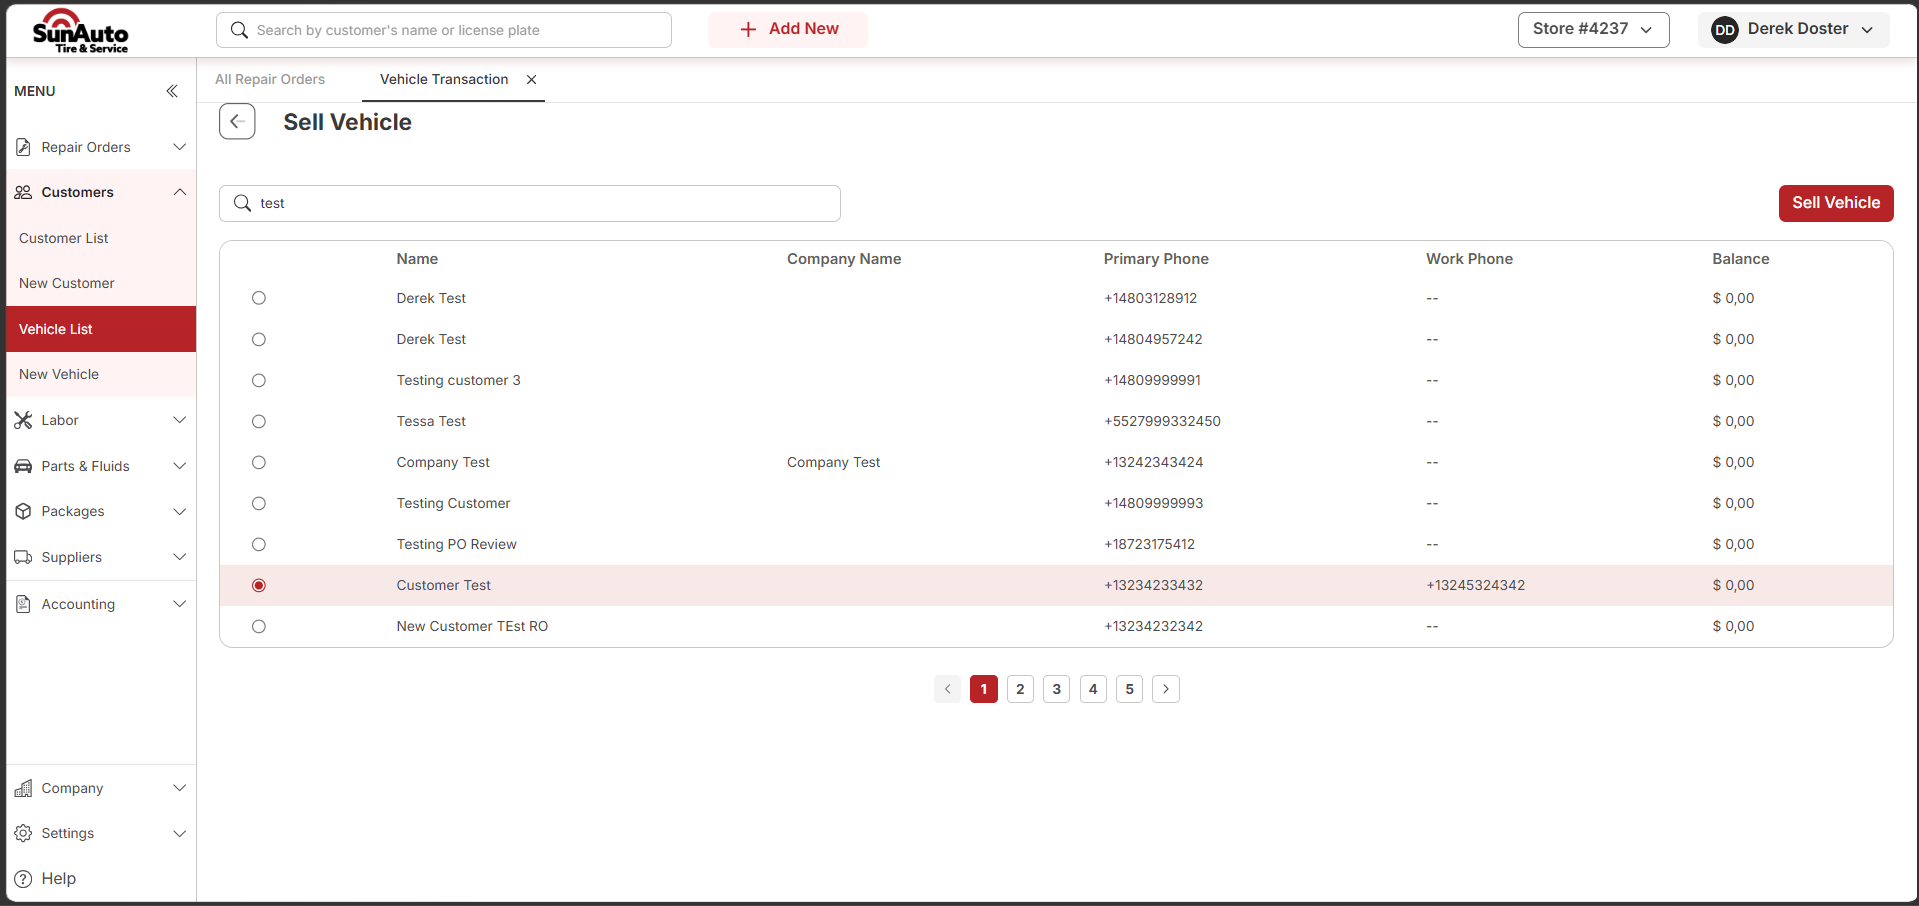 1Sell Vehicle — now enabled. Click it.
Step 4 — Confirm. The box names the vehicle and the buyer, and spells out what happens: the financial data stays with the original customer, while the new customer gets access to the vehicle's repair order history. Check both names, then click Confirm.
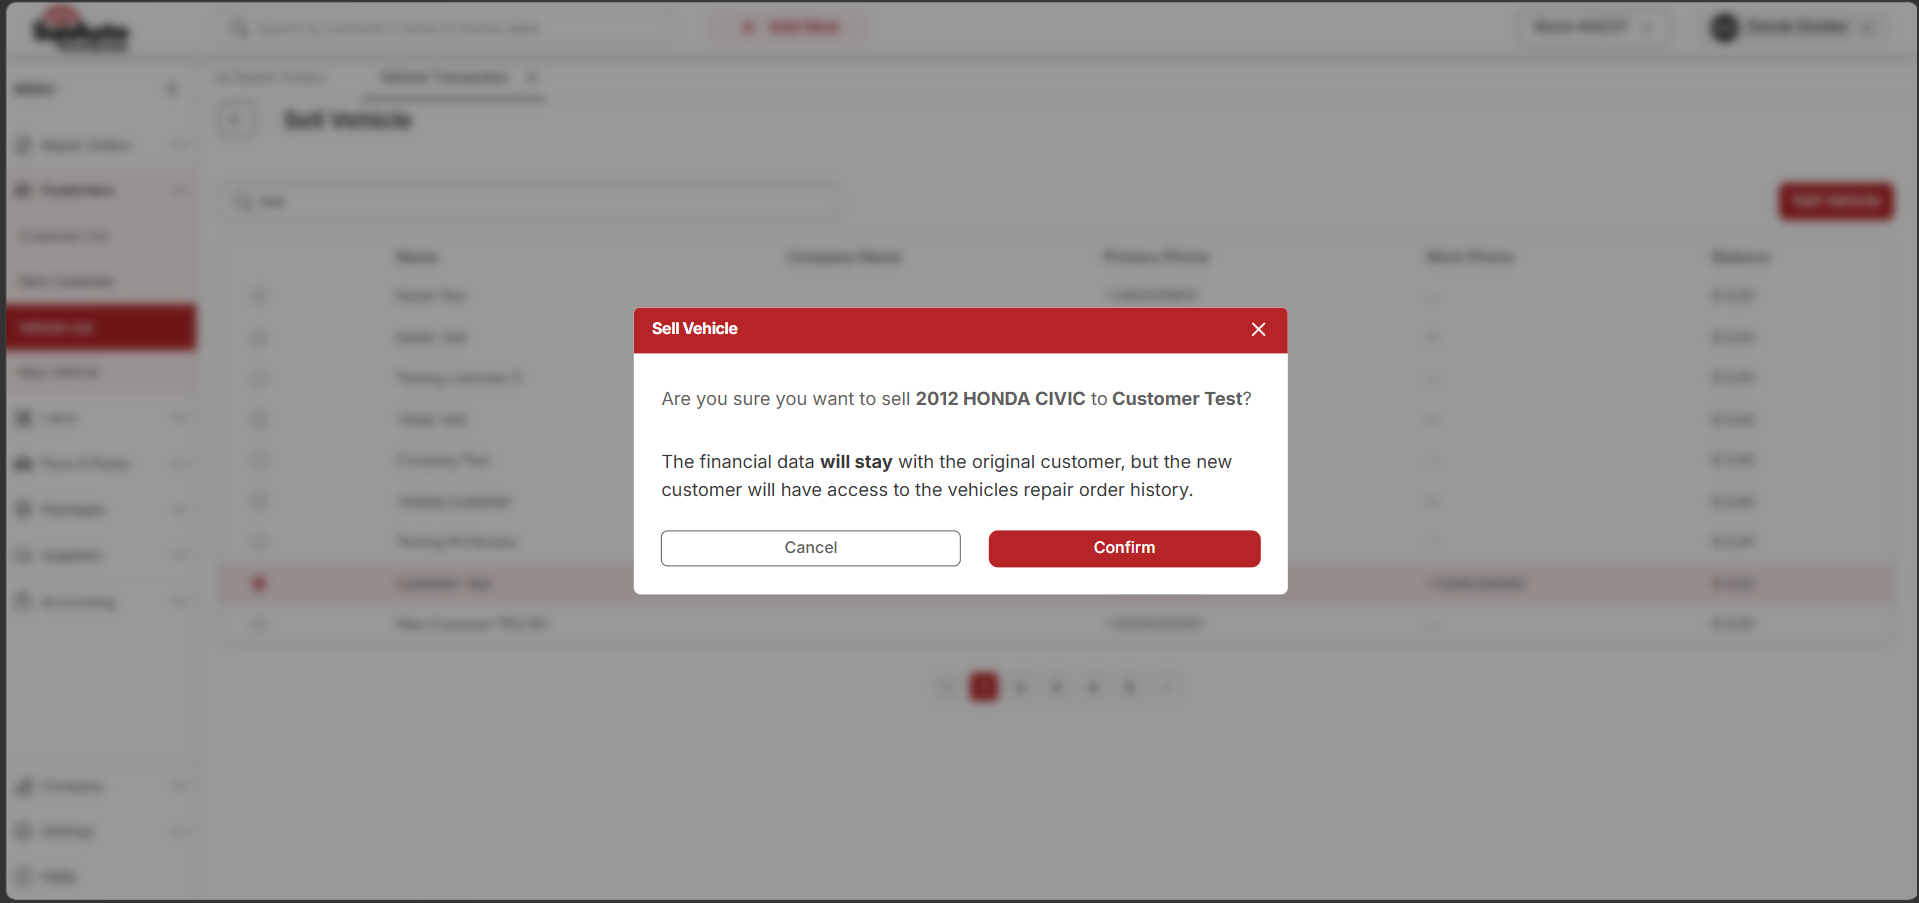 1The note that financial data will stay with the original customer — this is what makes it a sale rather than a transfer.
Use this when the vehicle is on the wrong record — it was attached to the wrong customer, or it's moving between people who share an account. All the history goes with it, payments included. Step through the slides — click the chips at the top, the Previous / Next buttons, or use the ← → arrow keys.
Step 1 — Open Options. On the vehicle's record, click Options, then Transfer Vehicle.
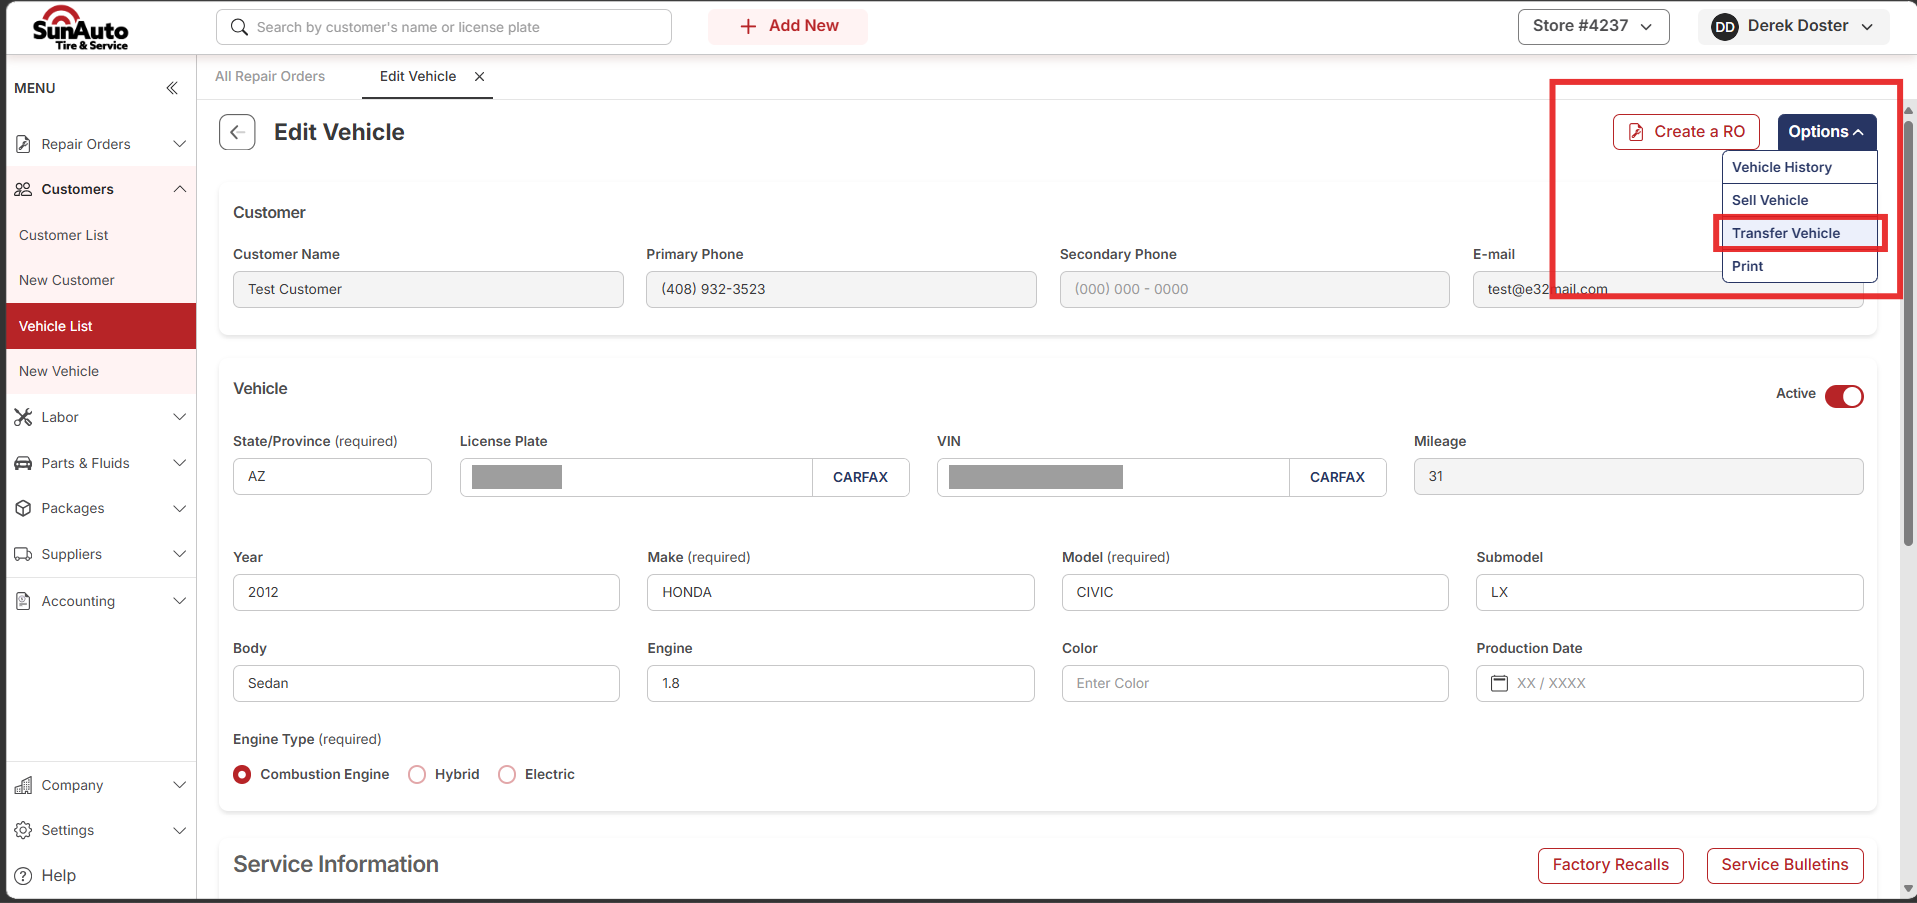 1Transfer Vehicle — click to start the transfer.
Step 2 — Find the right customer. A Transfer Vehicle customer list opens, without the current owner in it. Use Search to find the record the vehicle should have been on.
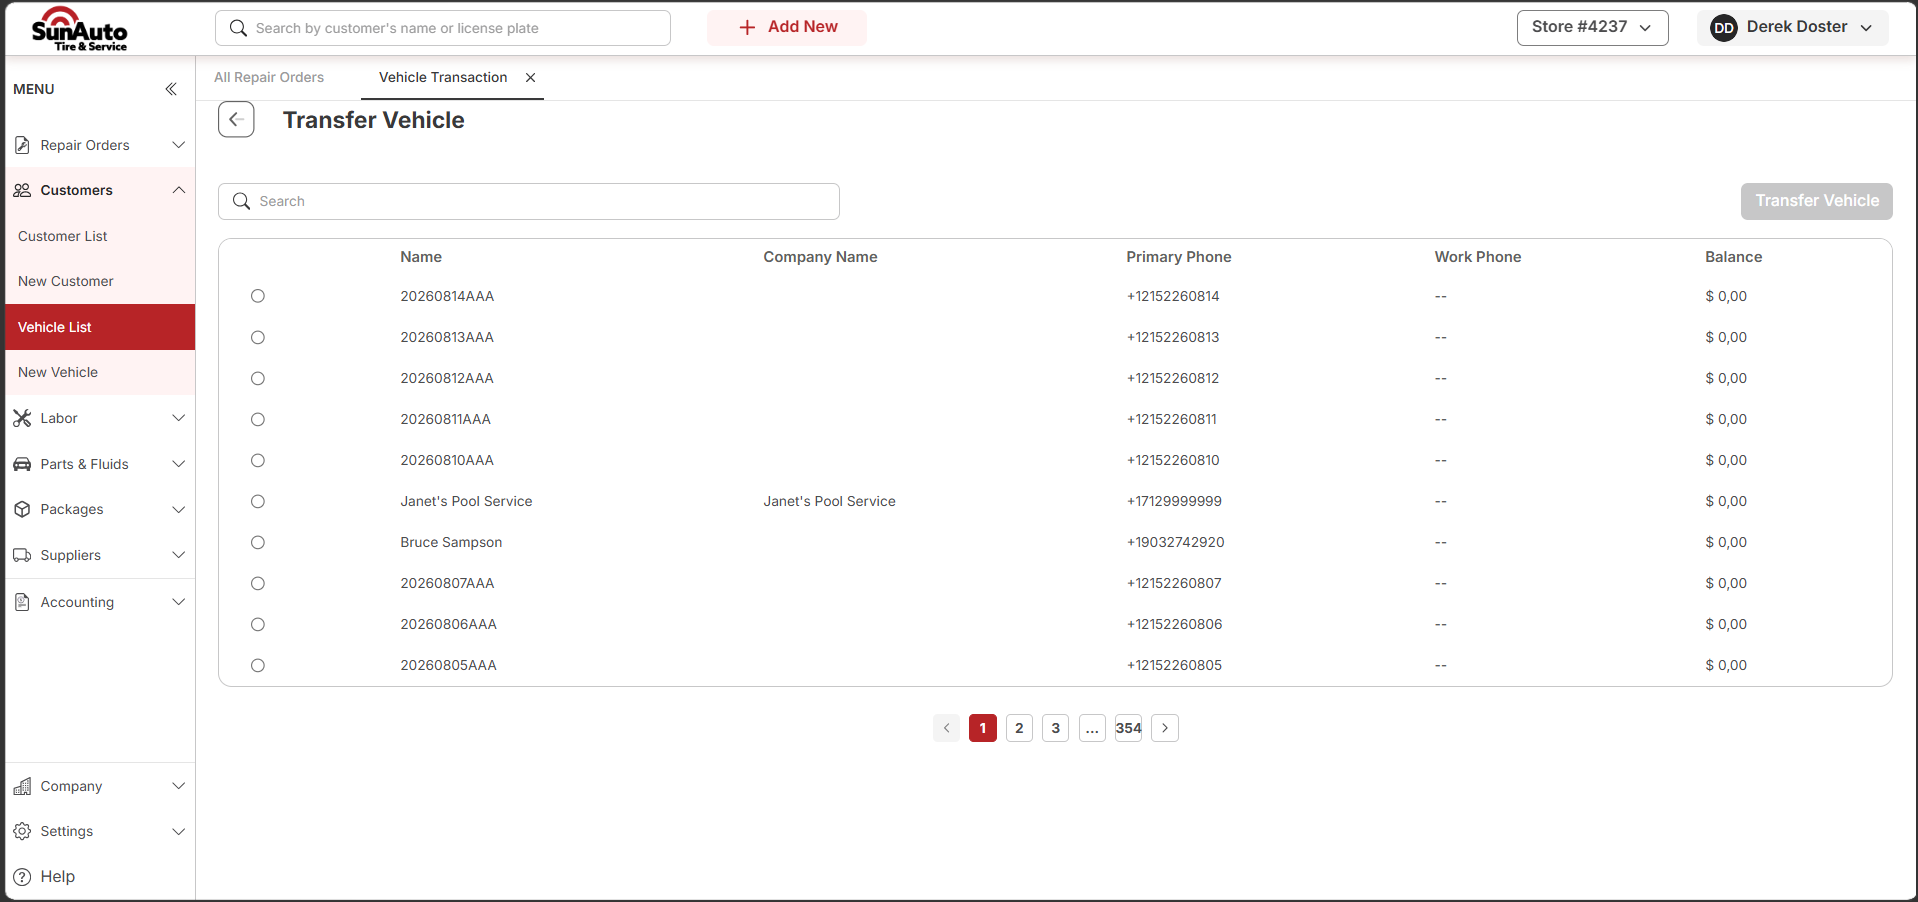 1Transfer Vehicle — the heading confirms which action you're in.
Step 3 — Select them. Tick the row and the Transfer Vehicle button turns on. It stays disabled until a customer is selected.
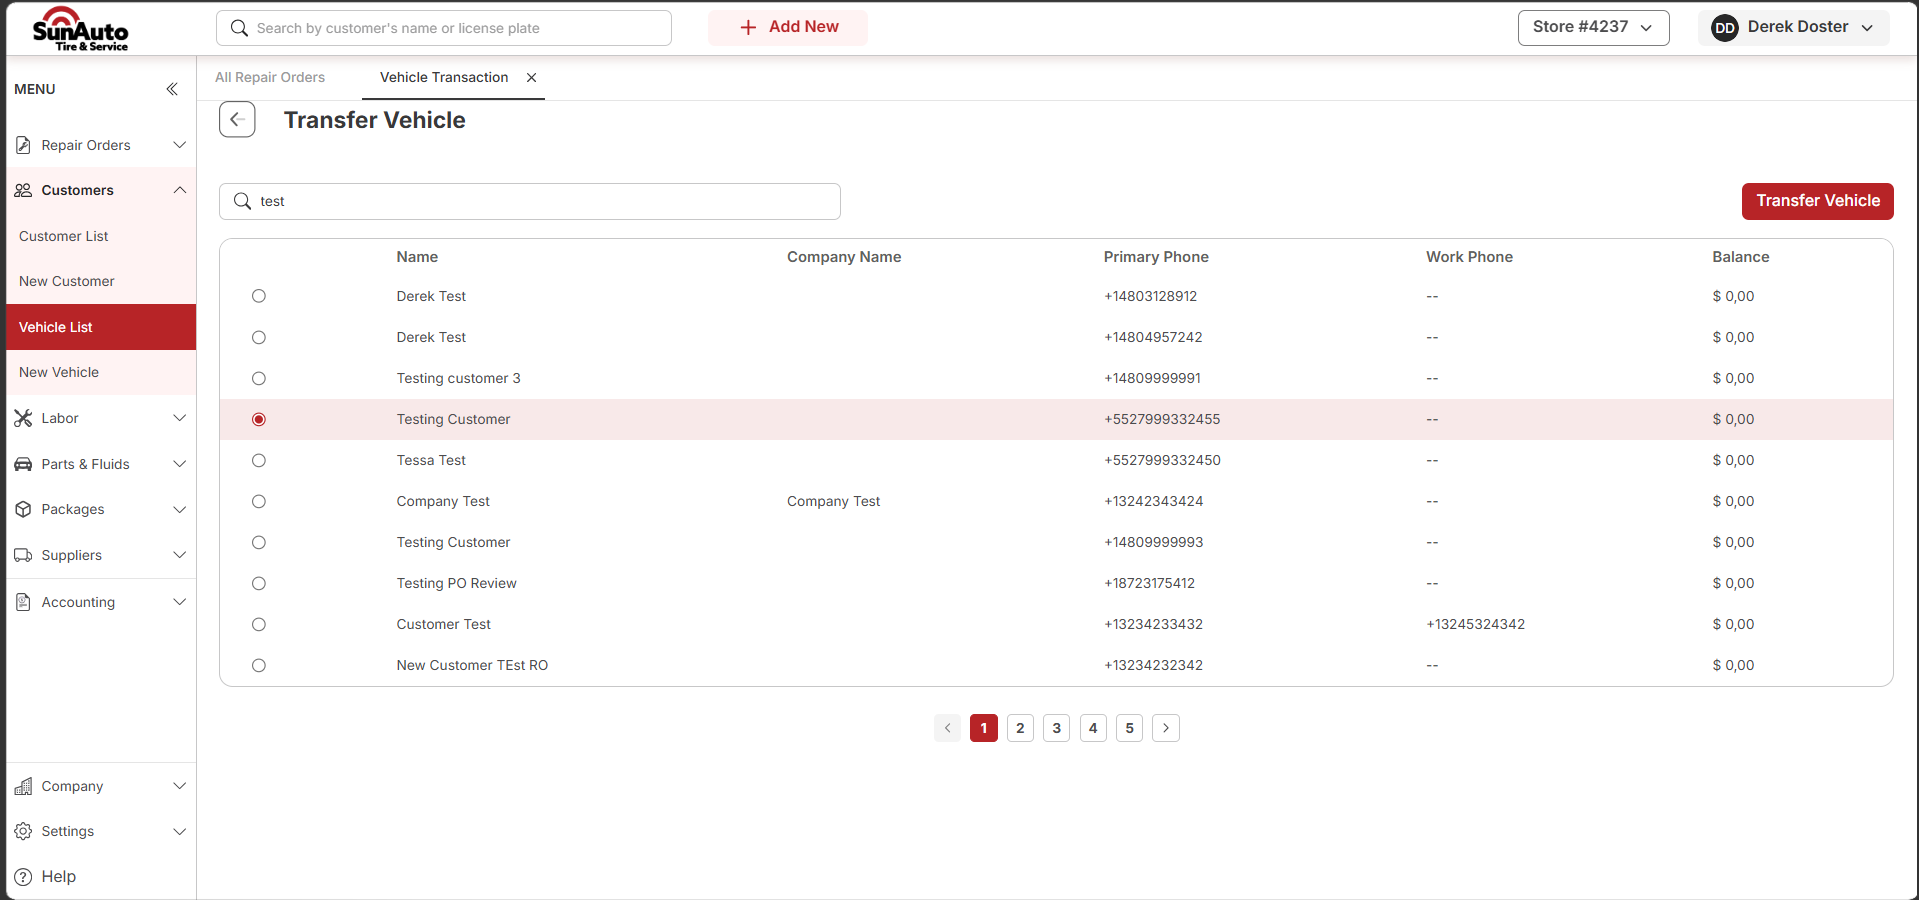 1Transfer Vehicle — now enabled. Click it.
Step 4 — Confirm. The box names the vehicle and the customer, and warns that this moves the vehicle and all its histories including repair orders and payments. If that isn't what you want, Cancel and use Sell Vehicle instead.
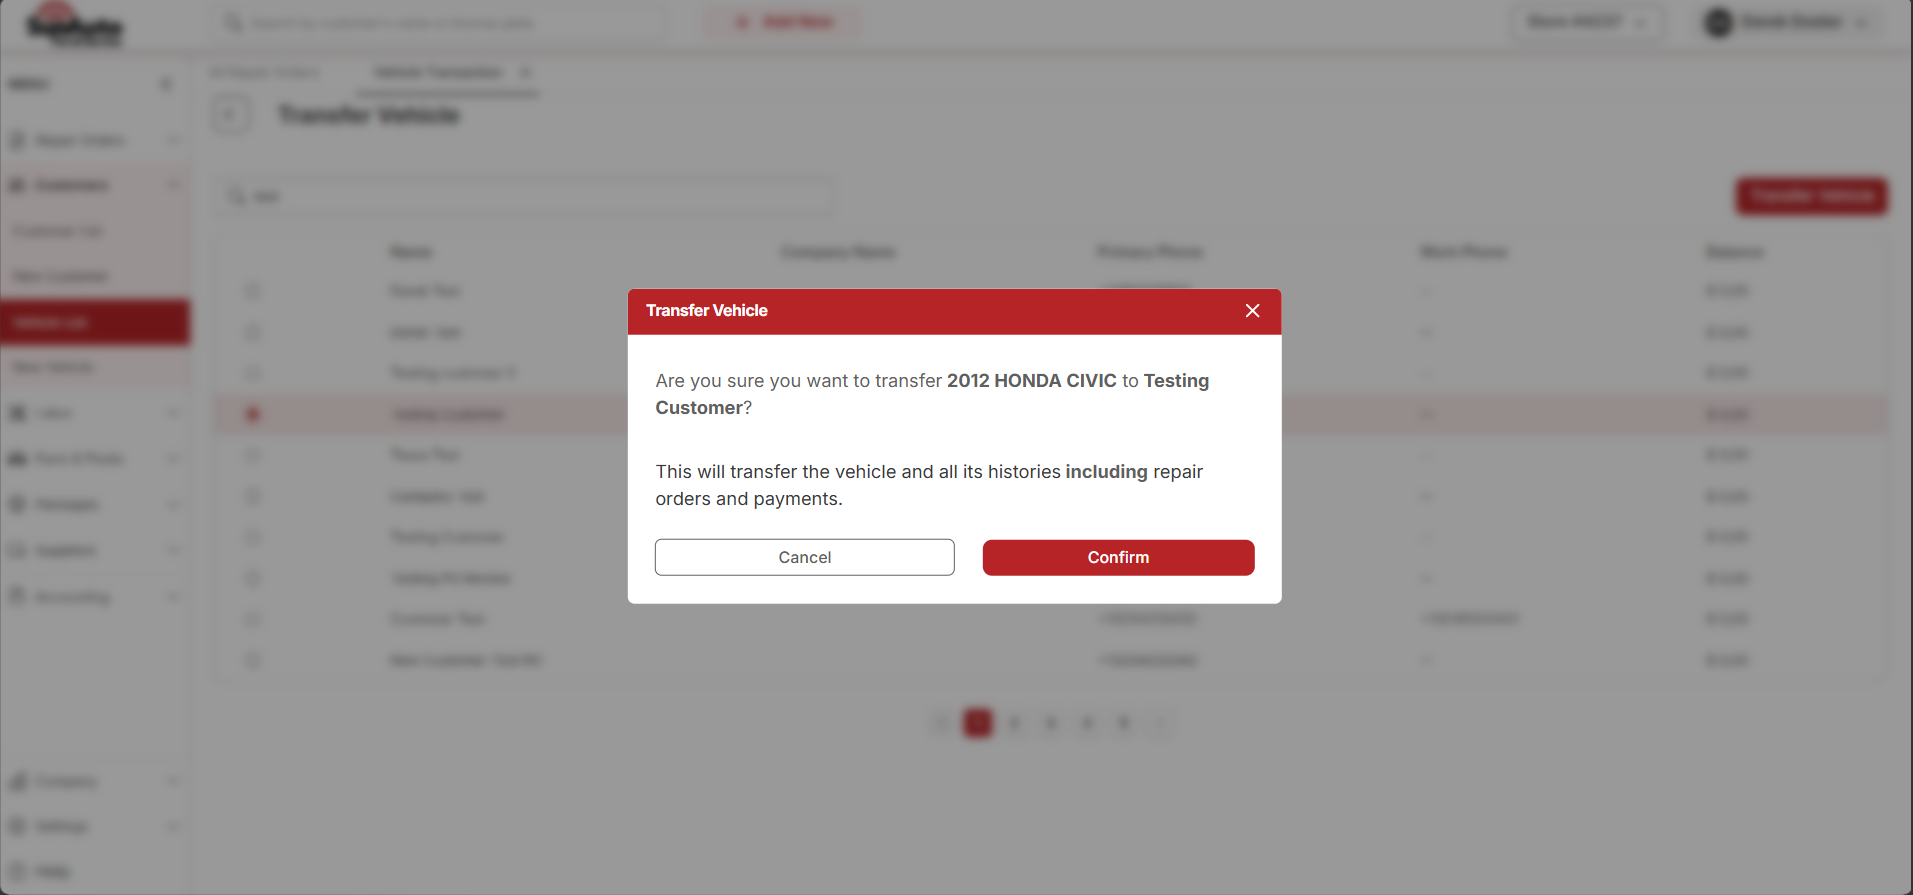 1The warning that all histories including repair orders and payments move too.
Either way, a message confirms it went through and you land back on the vehicle's record — now showing the new owner.
Related
- Adding a Vehicle — attaching a vehicle to a customer in the first place.
- Merging Duplicate Customers — for when the problem is two records for one person, not a vehicle on the wrong record.
- Customer or Vehicle Is Wrong — the counter playbook for bad customer or vehicle records.