Adding Labor
Labor lines come from the labor catalog, added to a Job through the + Add → Labor menu — the same menu you use to add parts from inventory, just a different option on the dropdown.
Step through the slides — click the chips at the top, the Previous / Next buttons, or use the ← → arrow keys.
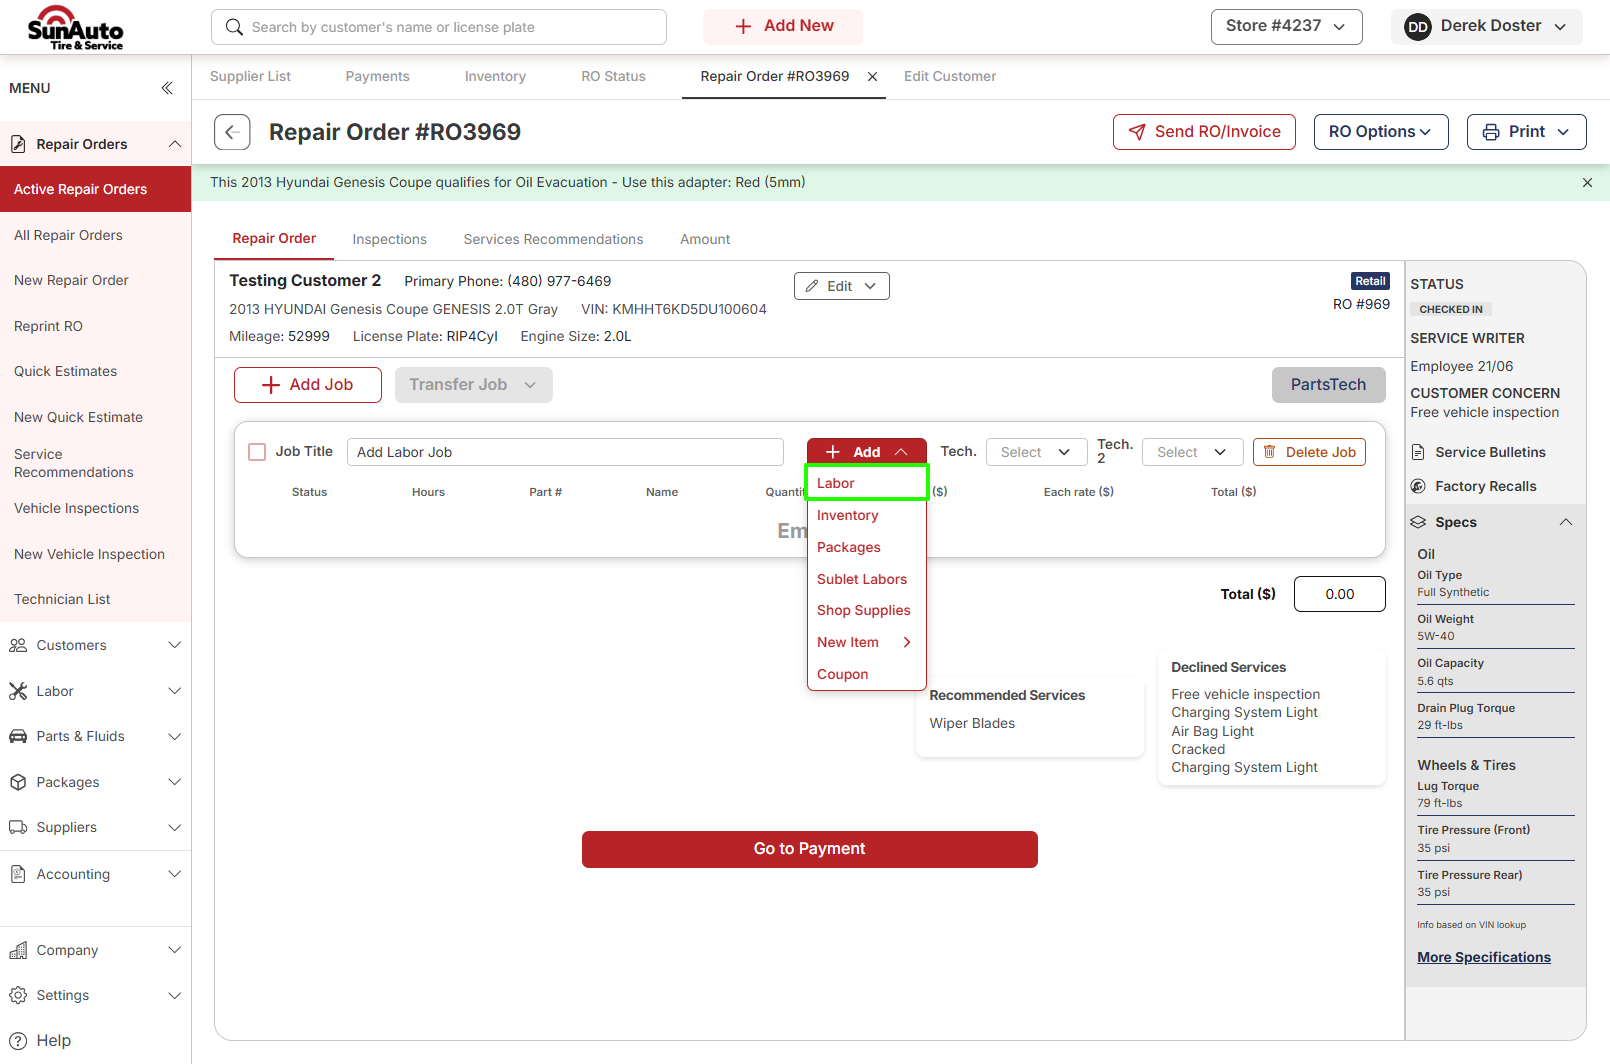
Step 1 — Open the labor picker from the Job. On the open RO, click the red + Add button on the Job and pick Labor — the first option on the dropdown.
 1
+ Add — the red button on the Job toolbar opens the dropdown of things you can add to this Job.
2
Labor — the first option on the dropdown. Opens the Labor List picker.
3
Tech. dropdown — assign the technician here once the labor line is on the Job (use Tech. 2 for a second tech).
1
+ Add — the red button on the Job toolbar opens the dropdown of things you can add to this Job.
2
Labor — the first option on the dropdown. Opens the Labor List picker.
3
Tech. dropdown — assign the technician here once the labor line is on the Job (use Tech. 2 for a second tech).
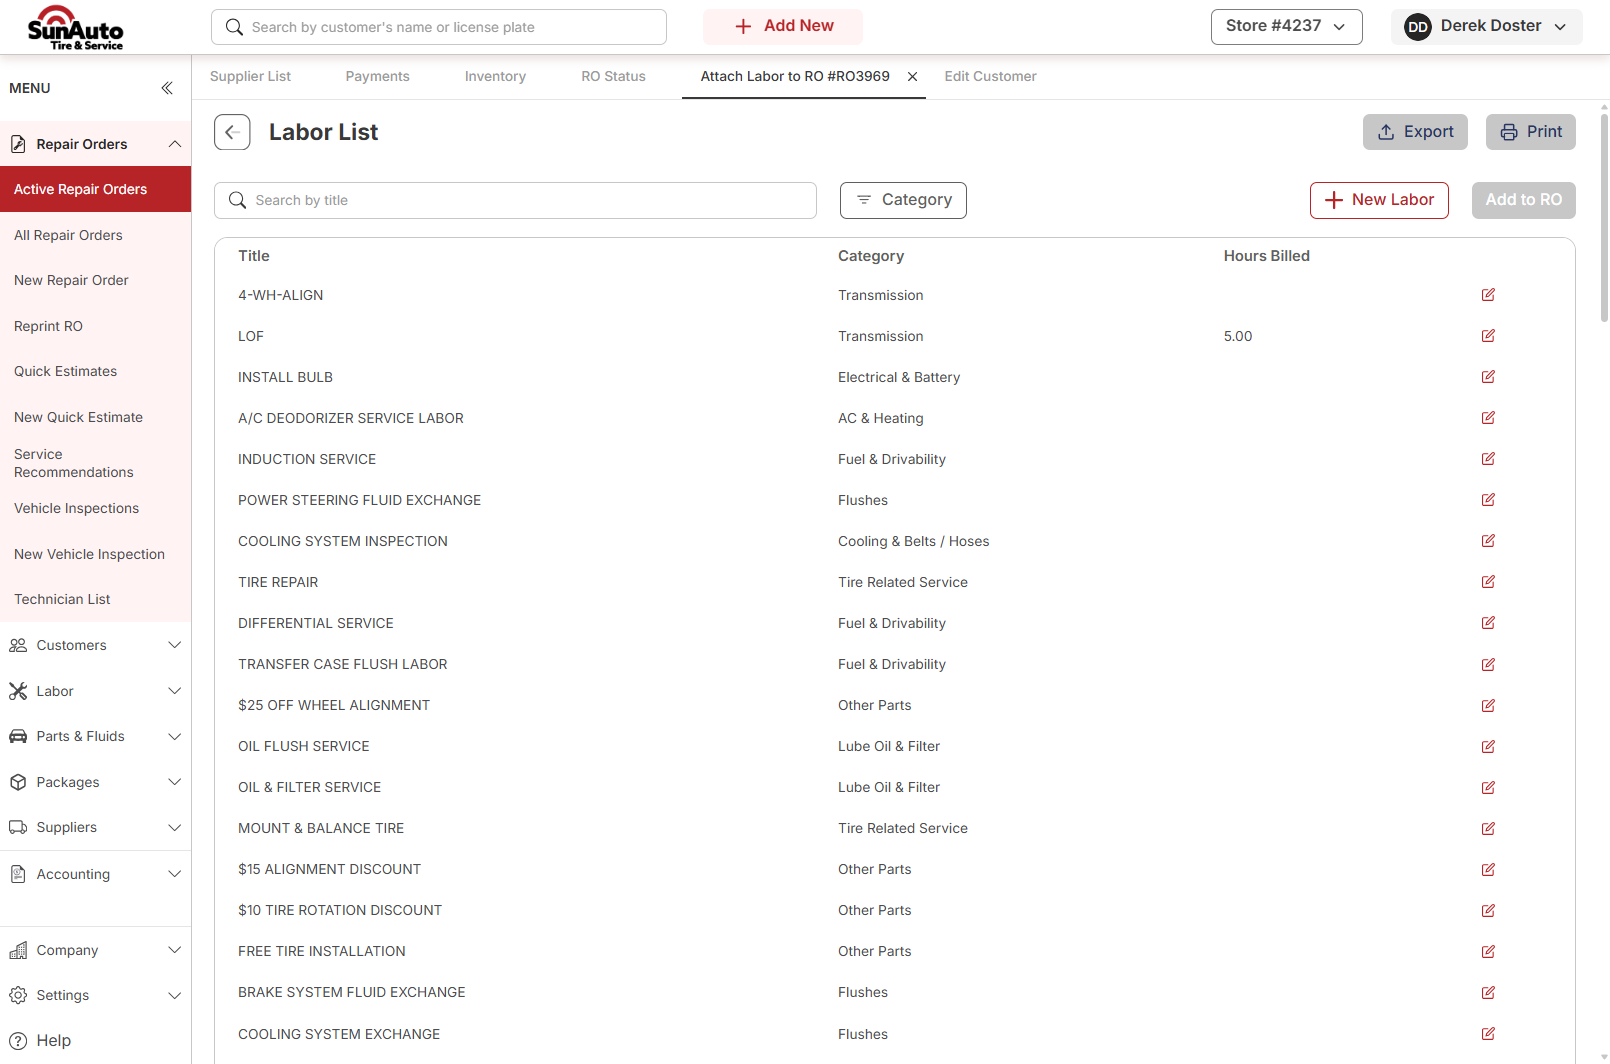
Step 2 — The Labor List picker opens. Search by title or filter by Category to find the operation, then use Add to RO to attach it to the Job. Each operation shows its Category and Hours Billed.
 1
Search by title — type the operation name to filter the catalog. Fastest way in.
2
Category filter — narrow the list by the kind of work when you don't know the exact title.
3
Add to RO — attaches the selected operation to the Job. Each row shows its Category and Hours Billed.
1
Search by title — type the operation name to filter the catalog. Fastest way in.
2
Category filter — narrow the list by the kind of work when you don't know the exact title.
3
Add to RO — attaches the selected operation to the Job. Each row shows its Category and Hours Billed.
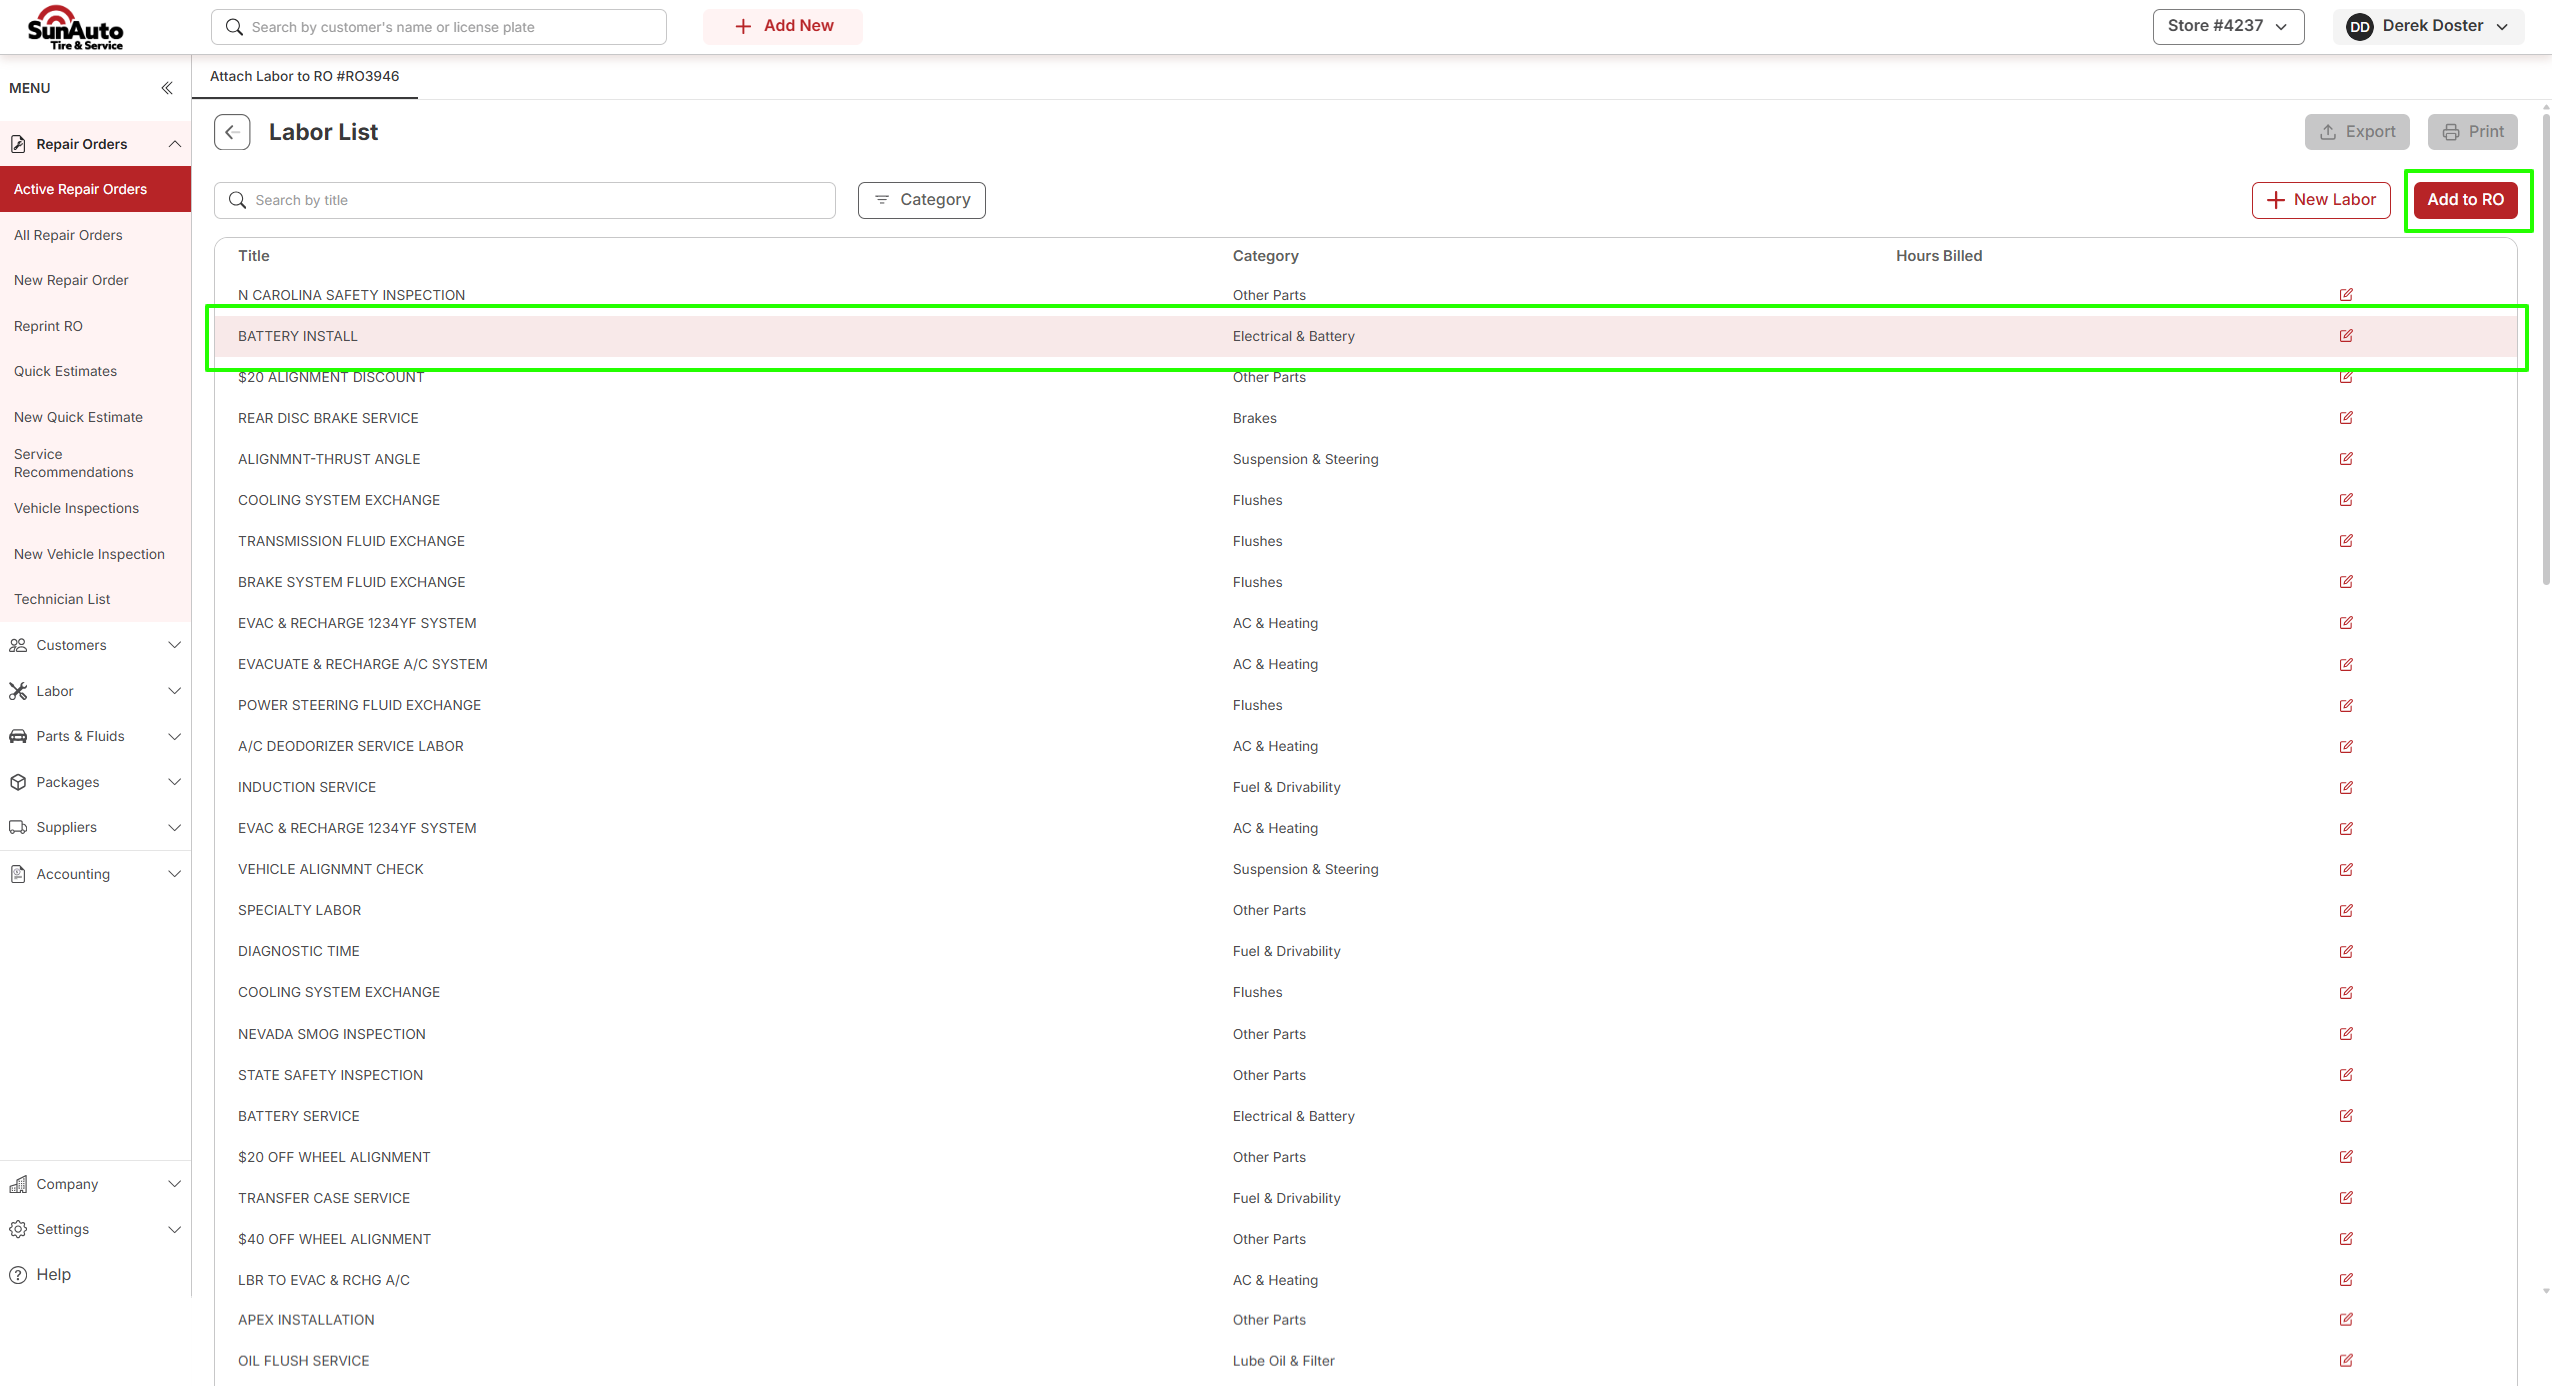
Step 3 — Find the operation and add it. On the Attach Labor to RO tab, use the Search by title field or the Category filter to narrow the list. Each row shows its Title, Category, and Hours Billed. Click the row to select it, then click Add to RO (top right, next to + New Labor). The toolbar also has Export and Print if you need them.
 1
Search by title and Category filter — narrow the list to the operation you need.
2
Selected row — click the operation to highlight it. Each row shows its Title, Category, and Hours Billed.
3
Add to RO — top right, next to + New Labor. Attaches the selected operation to the Job.
1
Search by title and Category filter — narrow the list to the operation you need.
2
Selected row — click the operation to highlight it. Each row shows its Title, Category, and Hours Billed.
3
Add to RO — top right, next to + New Labor. Attaches the selected operation to the Job.
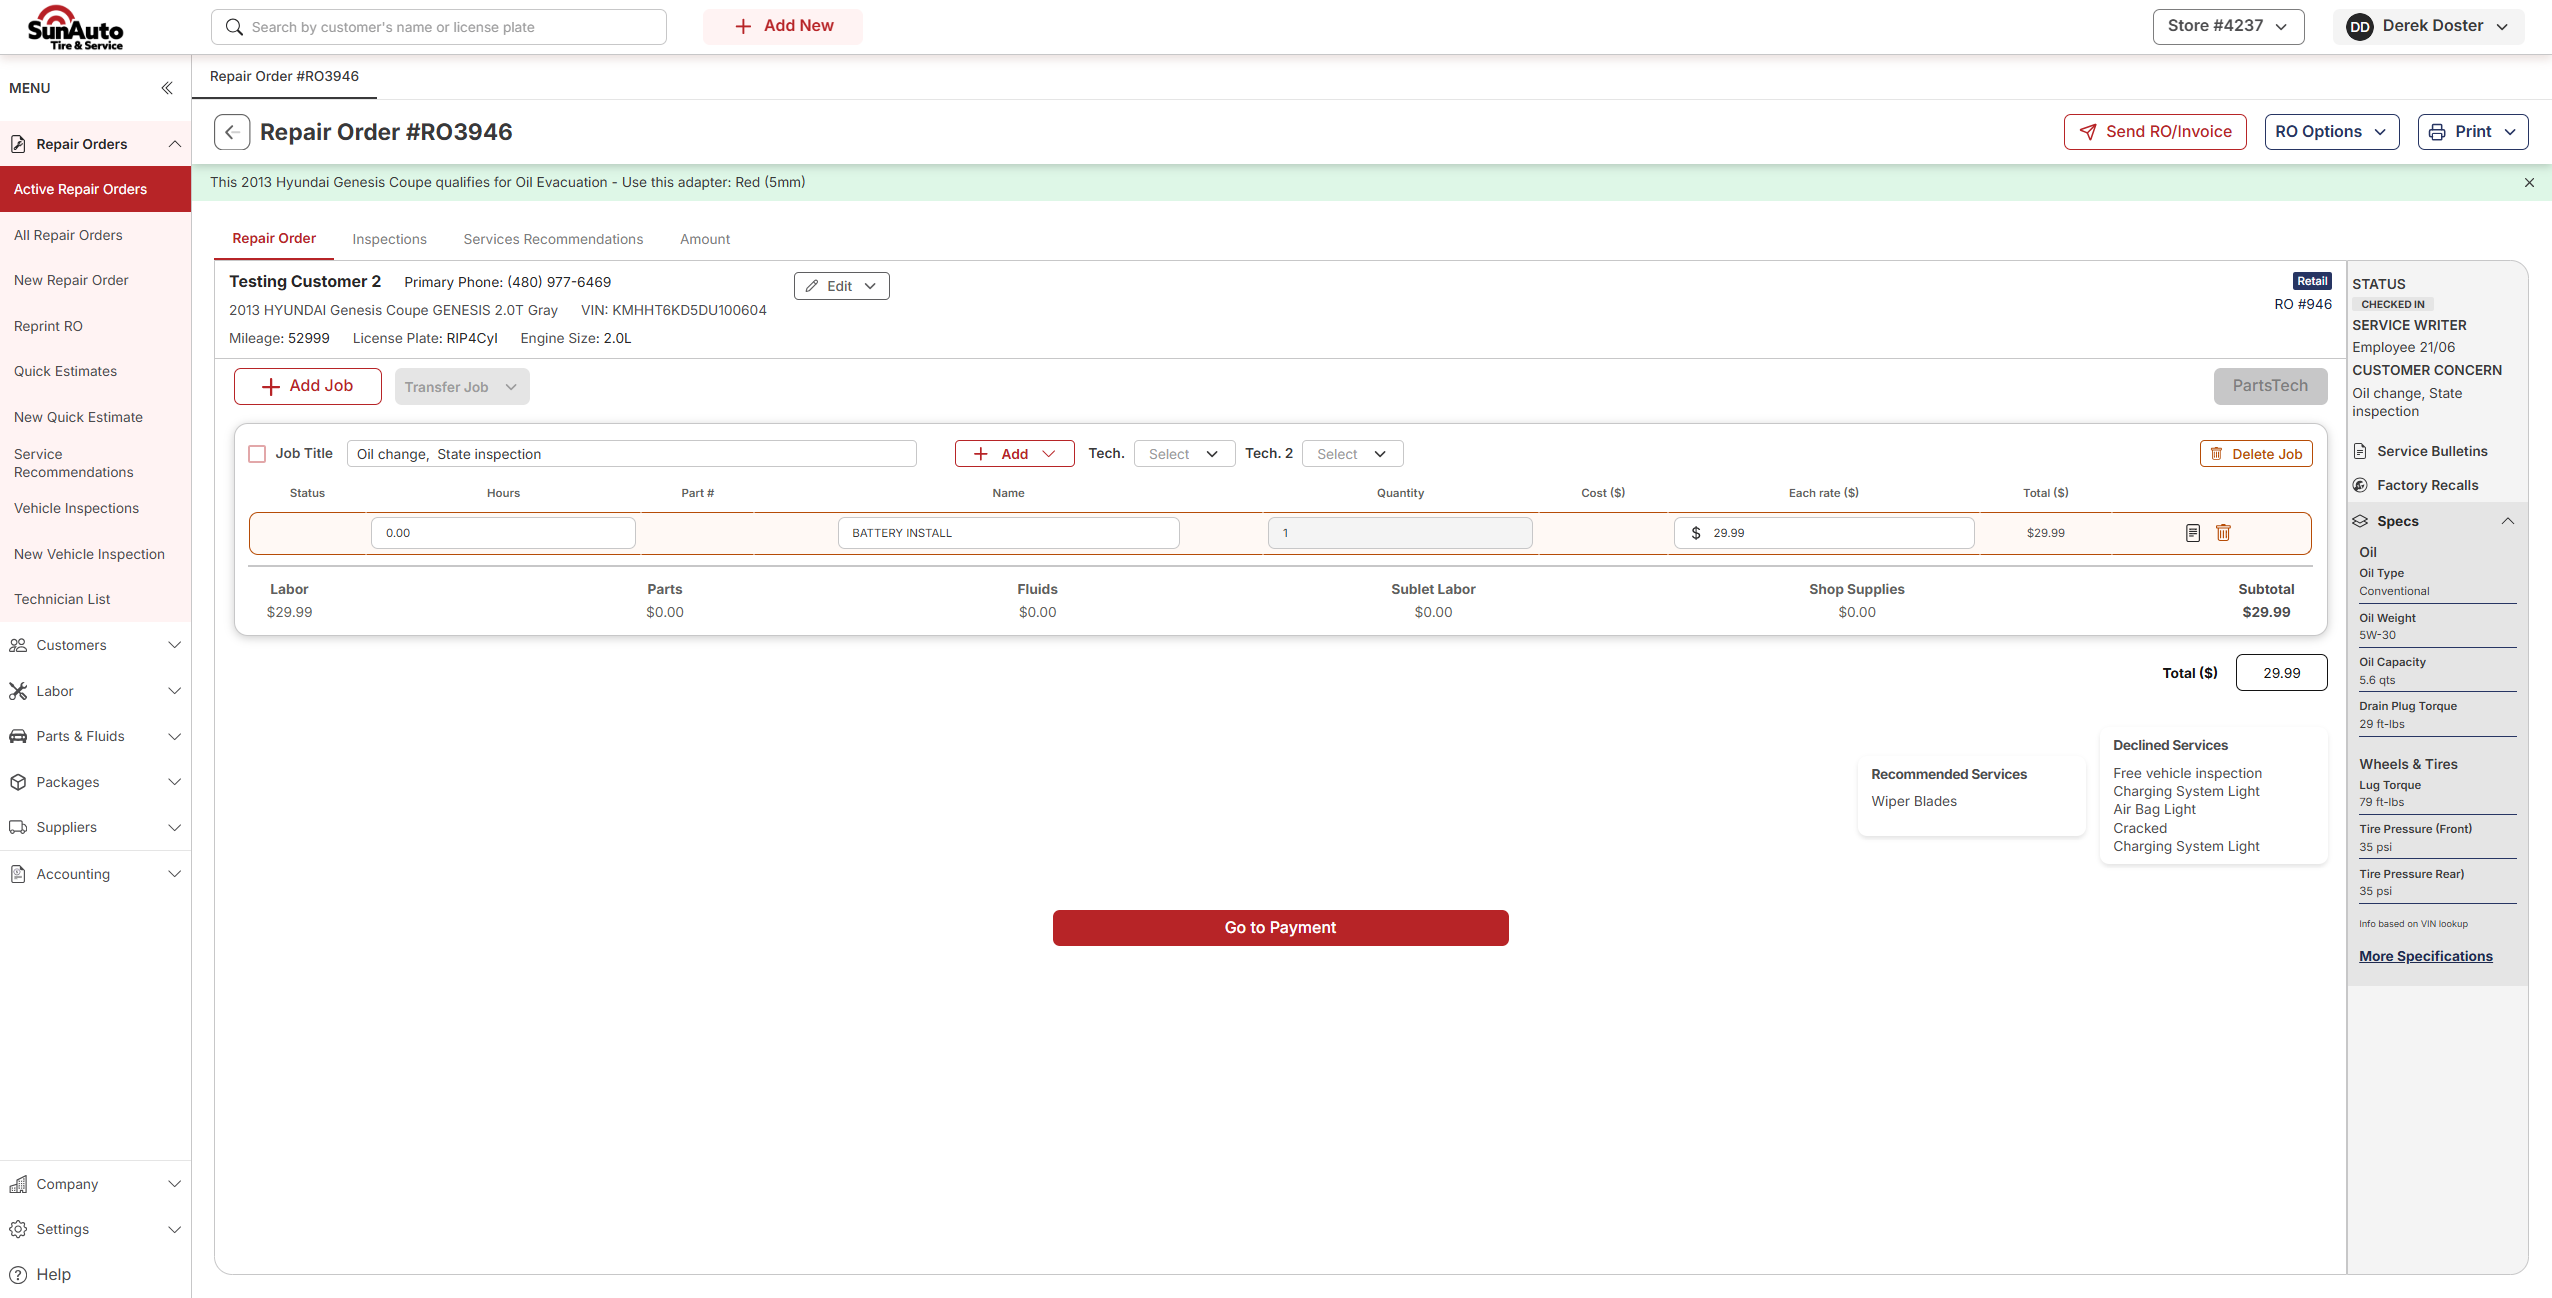
Step 4 — The labor line lands on the Job. Back on the RO, the operation shows as a line with its catalog rate already filled in — the Each rate ($) and Total ($) pull from the labor catalog, so you don't price it by hand. Assign the technician using the Tech. dropdown (use Tech. 2 if a second tech works it); both read Select until you pick someone. The price rolls into the Job's Labor subtotal, and the red Go to Payment button at the bottom moves you to checkout.
 1
The labor line on the Job — columns are Status, Hours, Part #, Name, Quantity, Cost ($), Each rate ($), and Total ($).
2
Each rate ($) and Total ($) — pulled straight from the labor catalog, so you don't price it by hand.
3
Tech. dropdown — assign the technician (use Tech. 2 for a second tech). Both read Select until you pick someone.
4
Go to Payment — the red button at the bottom moves you to checkout once the Job is finished. The line's price rolls into the Job's Labor subtotal.
1
The labor line on the Job — columns are Status, Hours, Part #, Name, Quantity, Cost ($), Each rate ($), and Total ($).
2
Each rate ($) and Total ($) — pulled straight from the labor catalog, so you don't price it by hand.
3
Tech. dropdown — assign the technician (use Tech. 2 for a second tech). Both read Select until you pick someone.
4
Go to Payment — the red button at the bottom moves you to checkout once the Job is finished. The line's price rolls into the Job's Labor subtotal.
Related
- Adding Parts — pulling parts onto a Job from inventory or PartsTech.
- Declining Jobs — what happens to labor and parts when a customer declines a Job.
- Closing an RO — taking the Job through Go to Payment to invoice.
- Payments — how payment is captured at checkout.