Closing a Repair Order
Closing an RO is the last step: confirm the work, take the final payment, and let OverDrive generate the invoice. Once it's paid in full, the RO is closed and finalized.
1. Review the RO before close
Before you take payment, walk the RO one more time. On each Job, check the lines:
- Parts — right part, right quantity, correct price. See Adding Parts.
- Labor — the labor operations match the work performed. See Adding Labor.
- Fees — any shop supplies or sublet lines are correct.
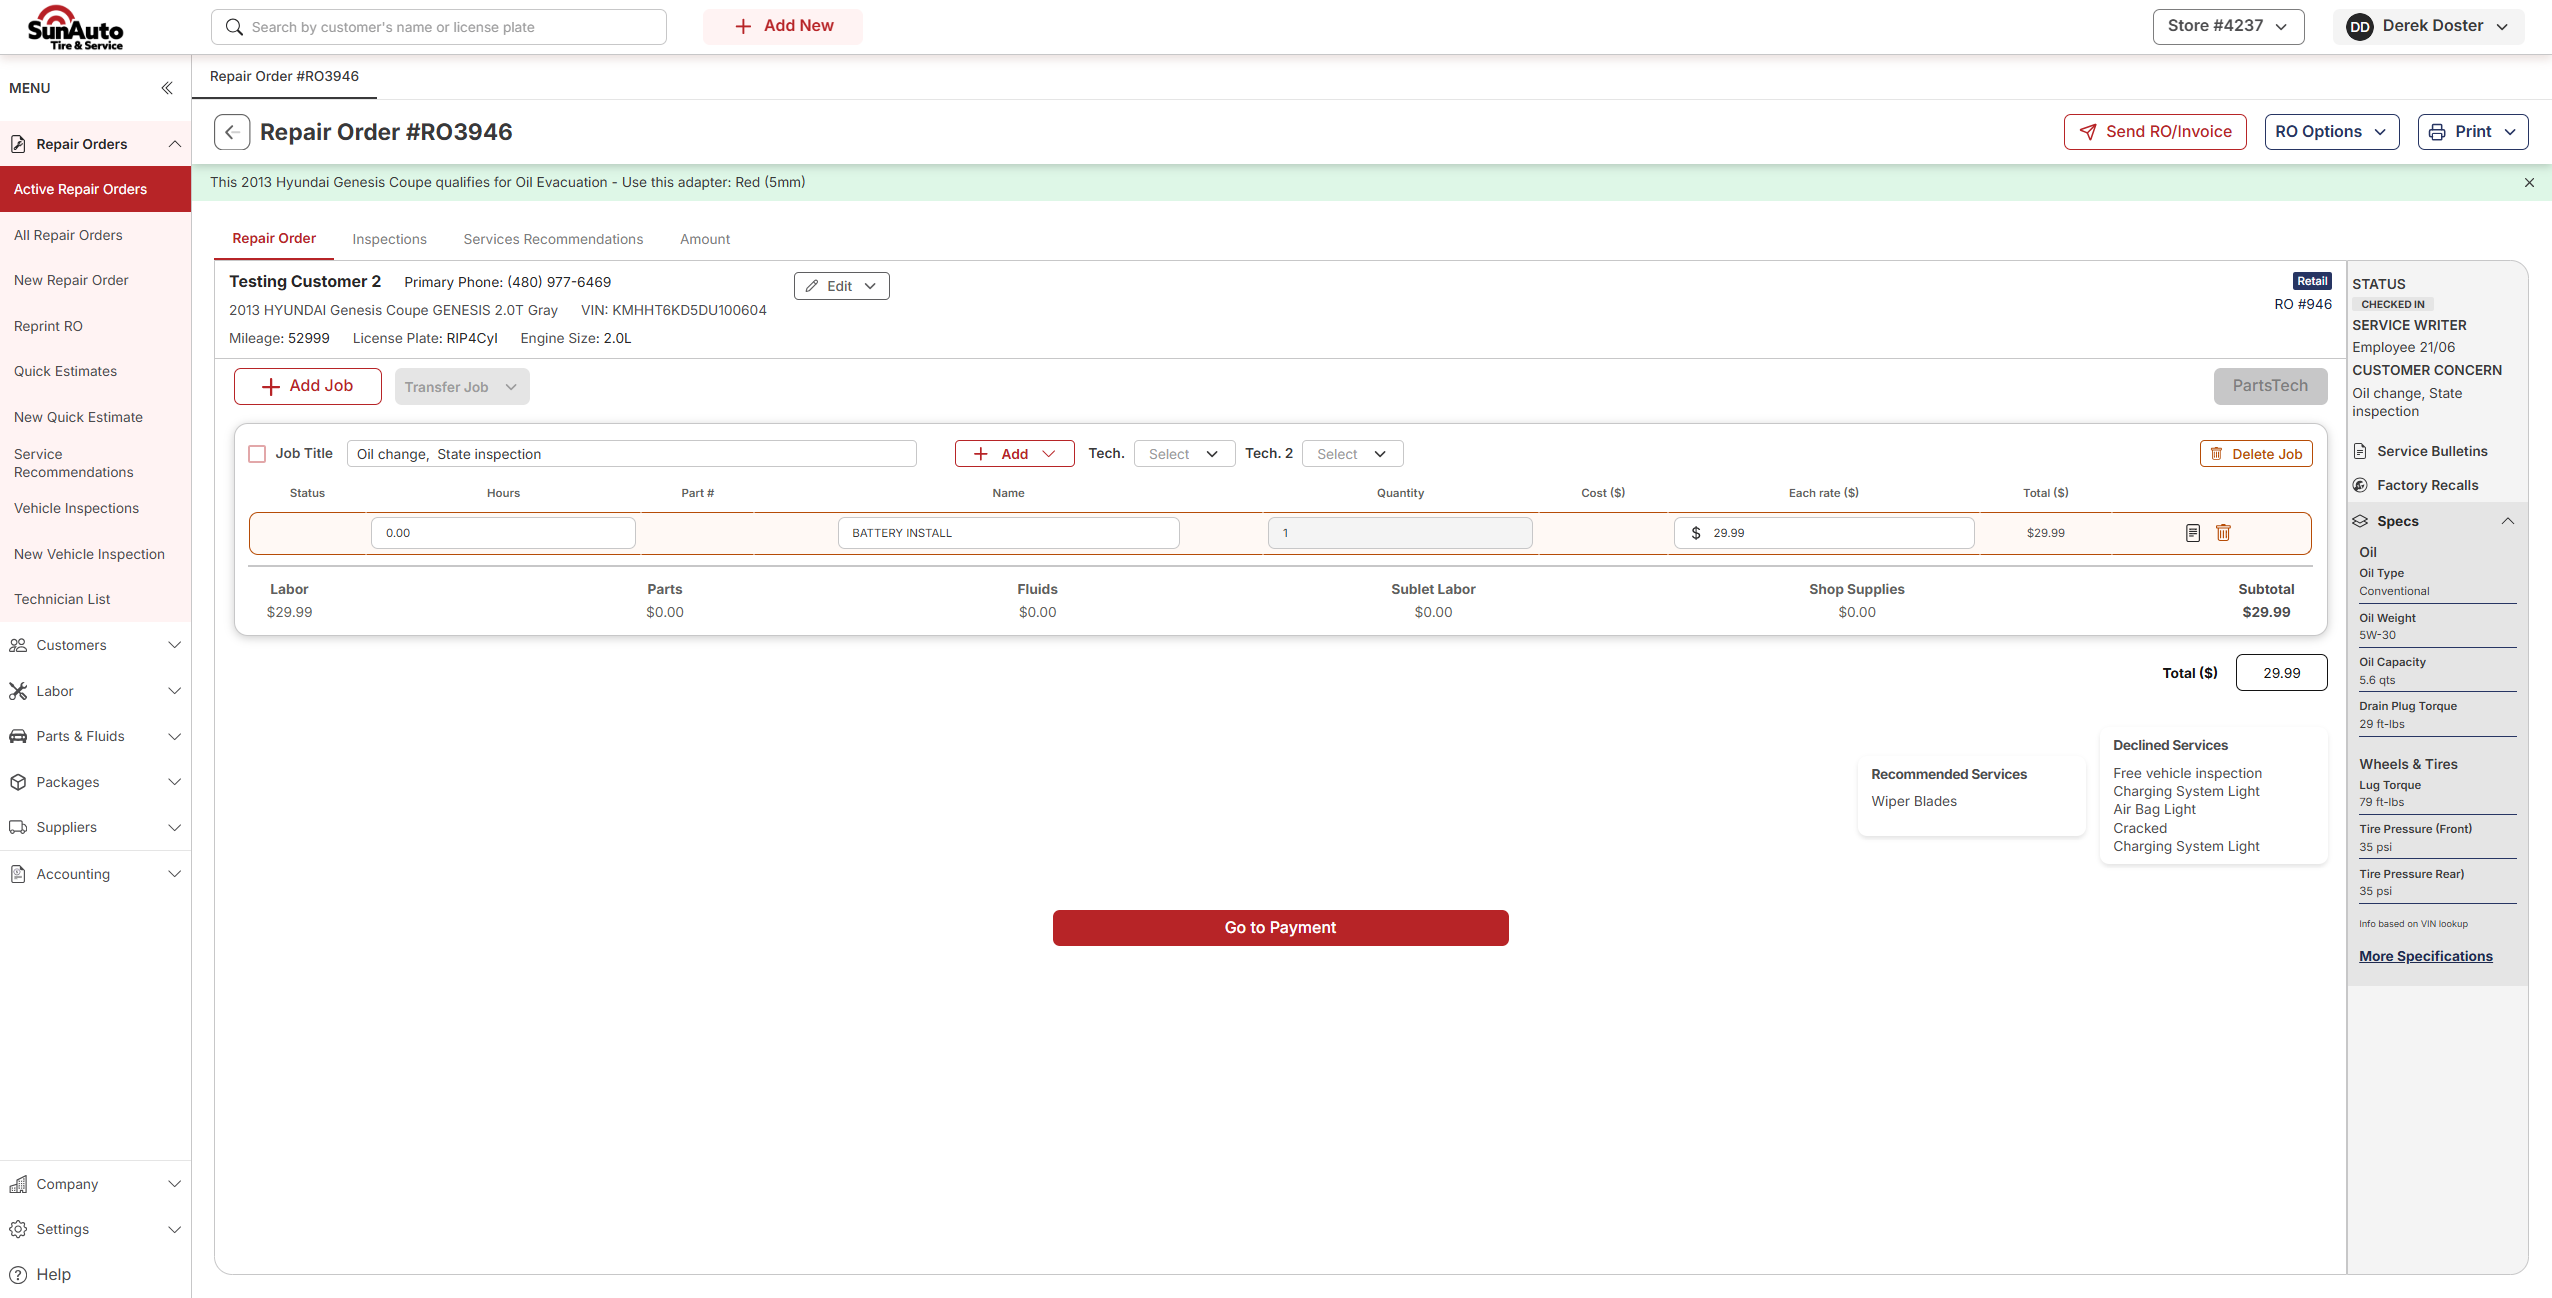
Then check the totals at the bottom of the RO — Labor, Parts, Fluids, Sublet Labor, Shop Supplies, Subtotal, and Total. They should reflect only the work the customer authorized.
Make sure declined and recommended Jobs are already off the active RO — a transferred Job doesn't get charged but stays on the vehicle's record. If any are still sitting on the RO, handle them first. See Declining and Transferring Jobs.
2. Go to Payment
On the finished RO, click the red Go to Payment button at the bottom of the Job. (The same button also sits on the RO's Amount tab.) This opens the New Payment screen.
3. Take the final payment
The New Payment screen is where you collect what's owed. The full walkthrough — the payment methods (cash, check, card) and split payments — lives on the Payments page.
Any payments applied earlier in the job already show under Payment History and reduce the remaining balance, so the final payment only needs to cover what's left.
4. Invoice + closed
Paying the balance in full generates the Invoice and marks the RO REPAIR ORDER CLOSED. The invoice comes out per the Invoice Export Type chosen on the payment screen — PDF, E-mail, or Both.
Step through the slides — click the chips at the top, the Previous / Next buttons, or use the ← → arrow keys.
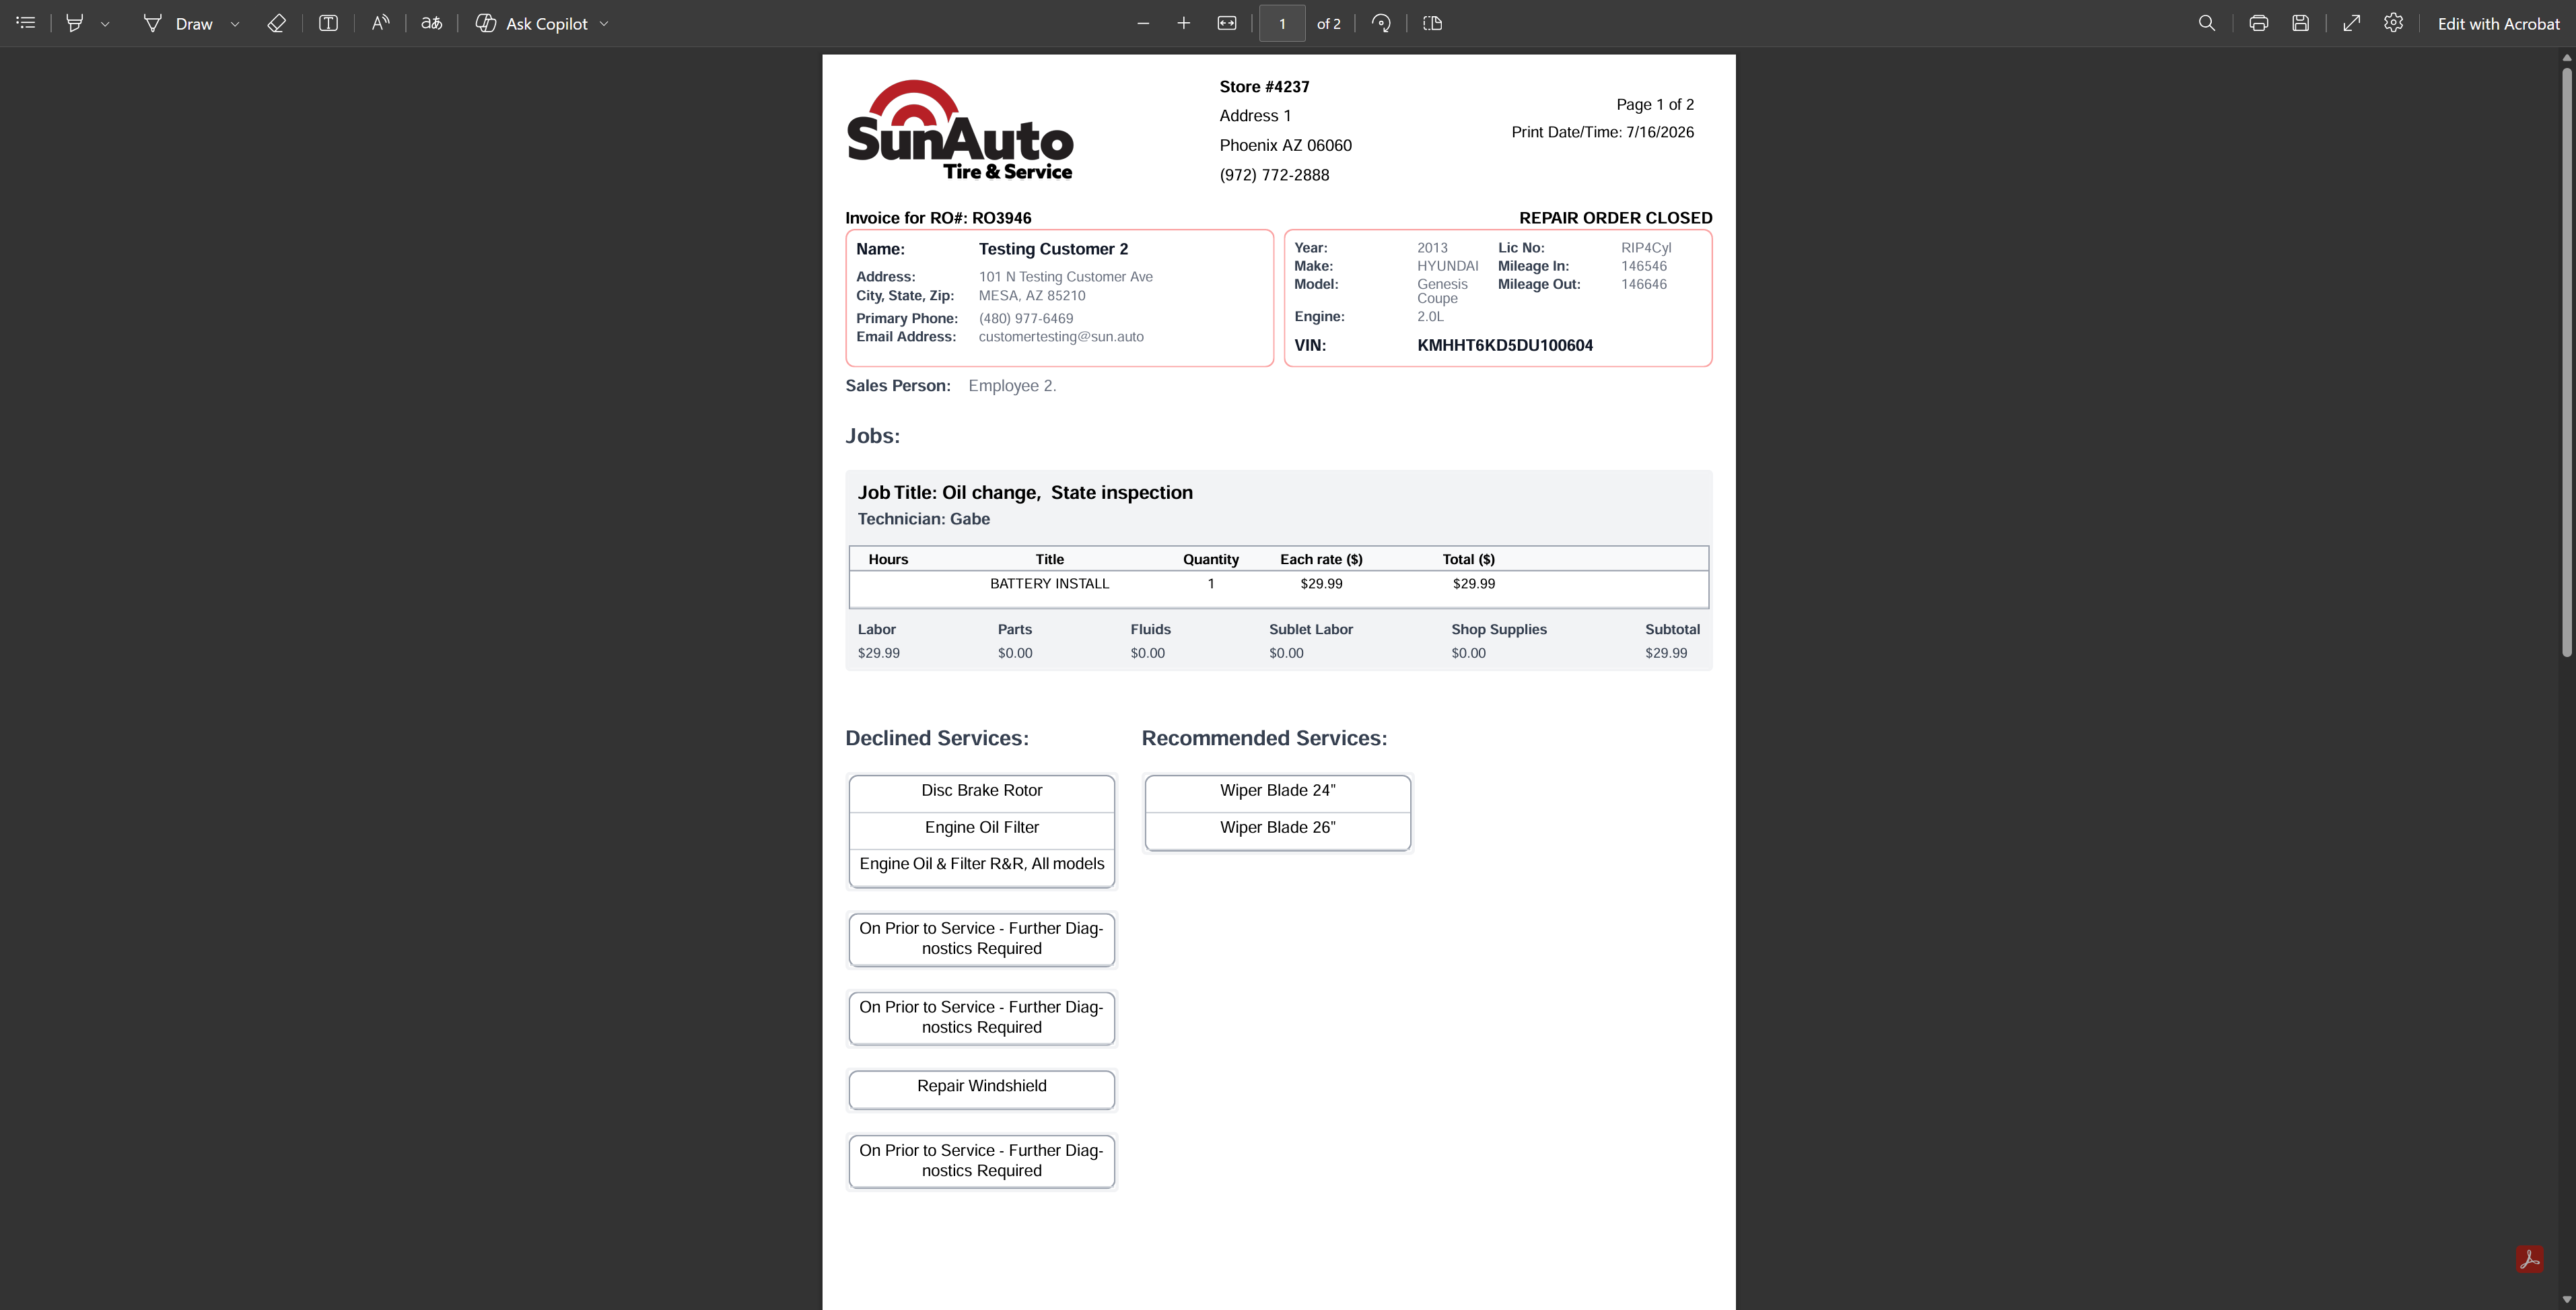
The invoice. When the payments cover the full total and the balance drops to zero, OverDrive generates the Invoice and marks the RO REPAIR ORDER CLOSED. The header shows the store block and the title "Invoice for RO#: ...".
 1
Store block — store number, address, and phone at the top of the invoice.
2
Invoice for RO#: ... — the invoice title, tied to the Repair Order it closes.
3
REPAIR ORDER CLOSED — the status once the balance reaches zero.
1
Store block — store number, address, and phone at the top of the invoice.
2
Invoice for RO#: ... — the invoice title, tied to the Repair Order it closes.
3
REPAIR ORDER CLOSED — the status once the balance reaches zero.
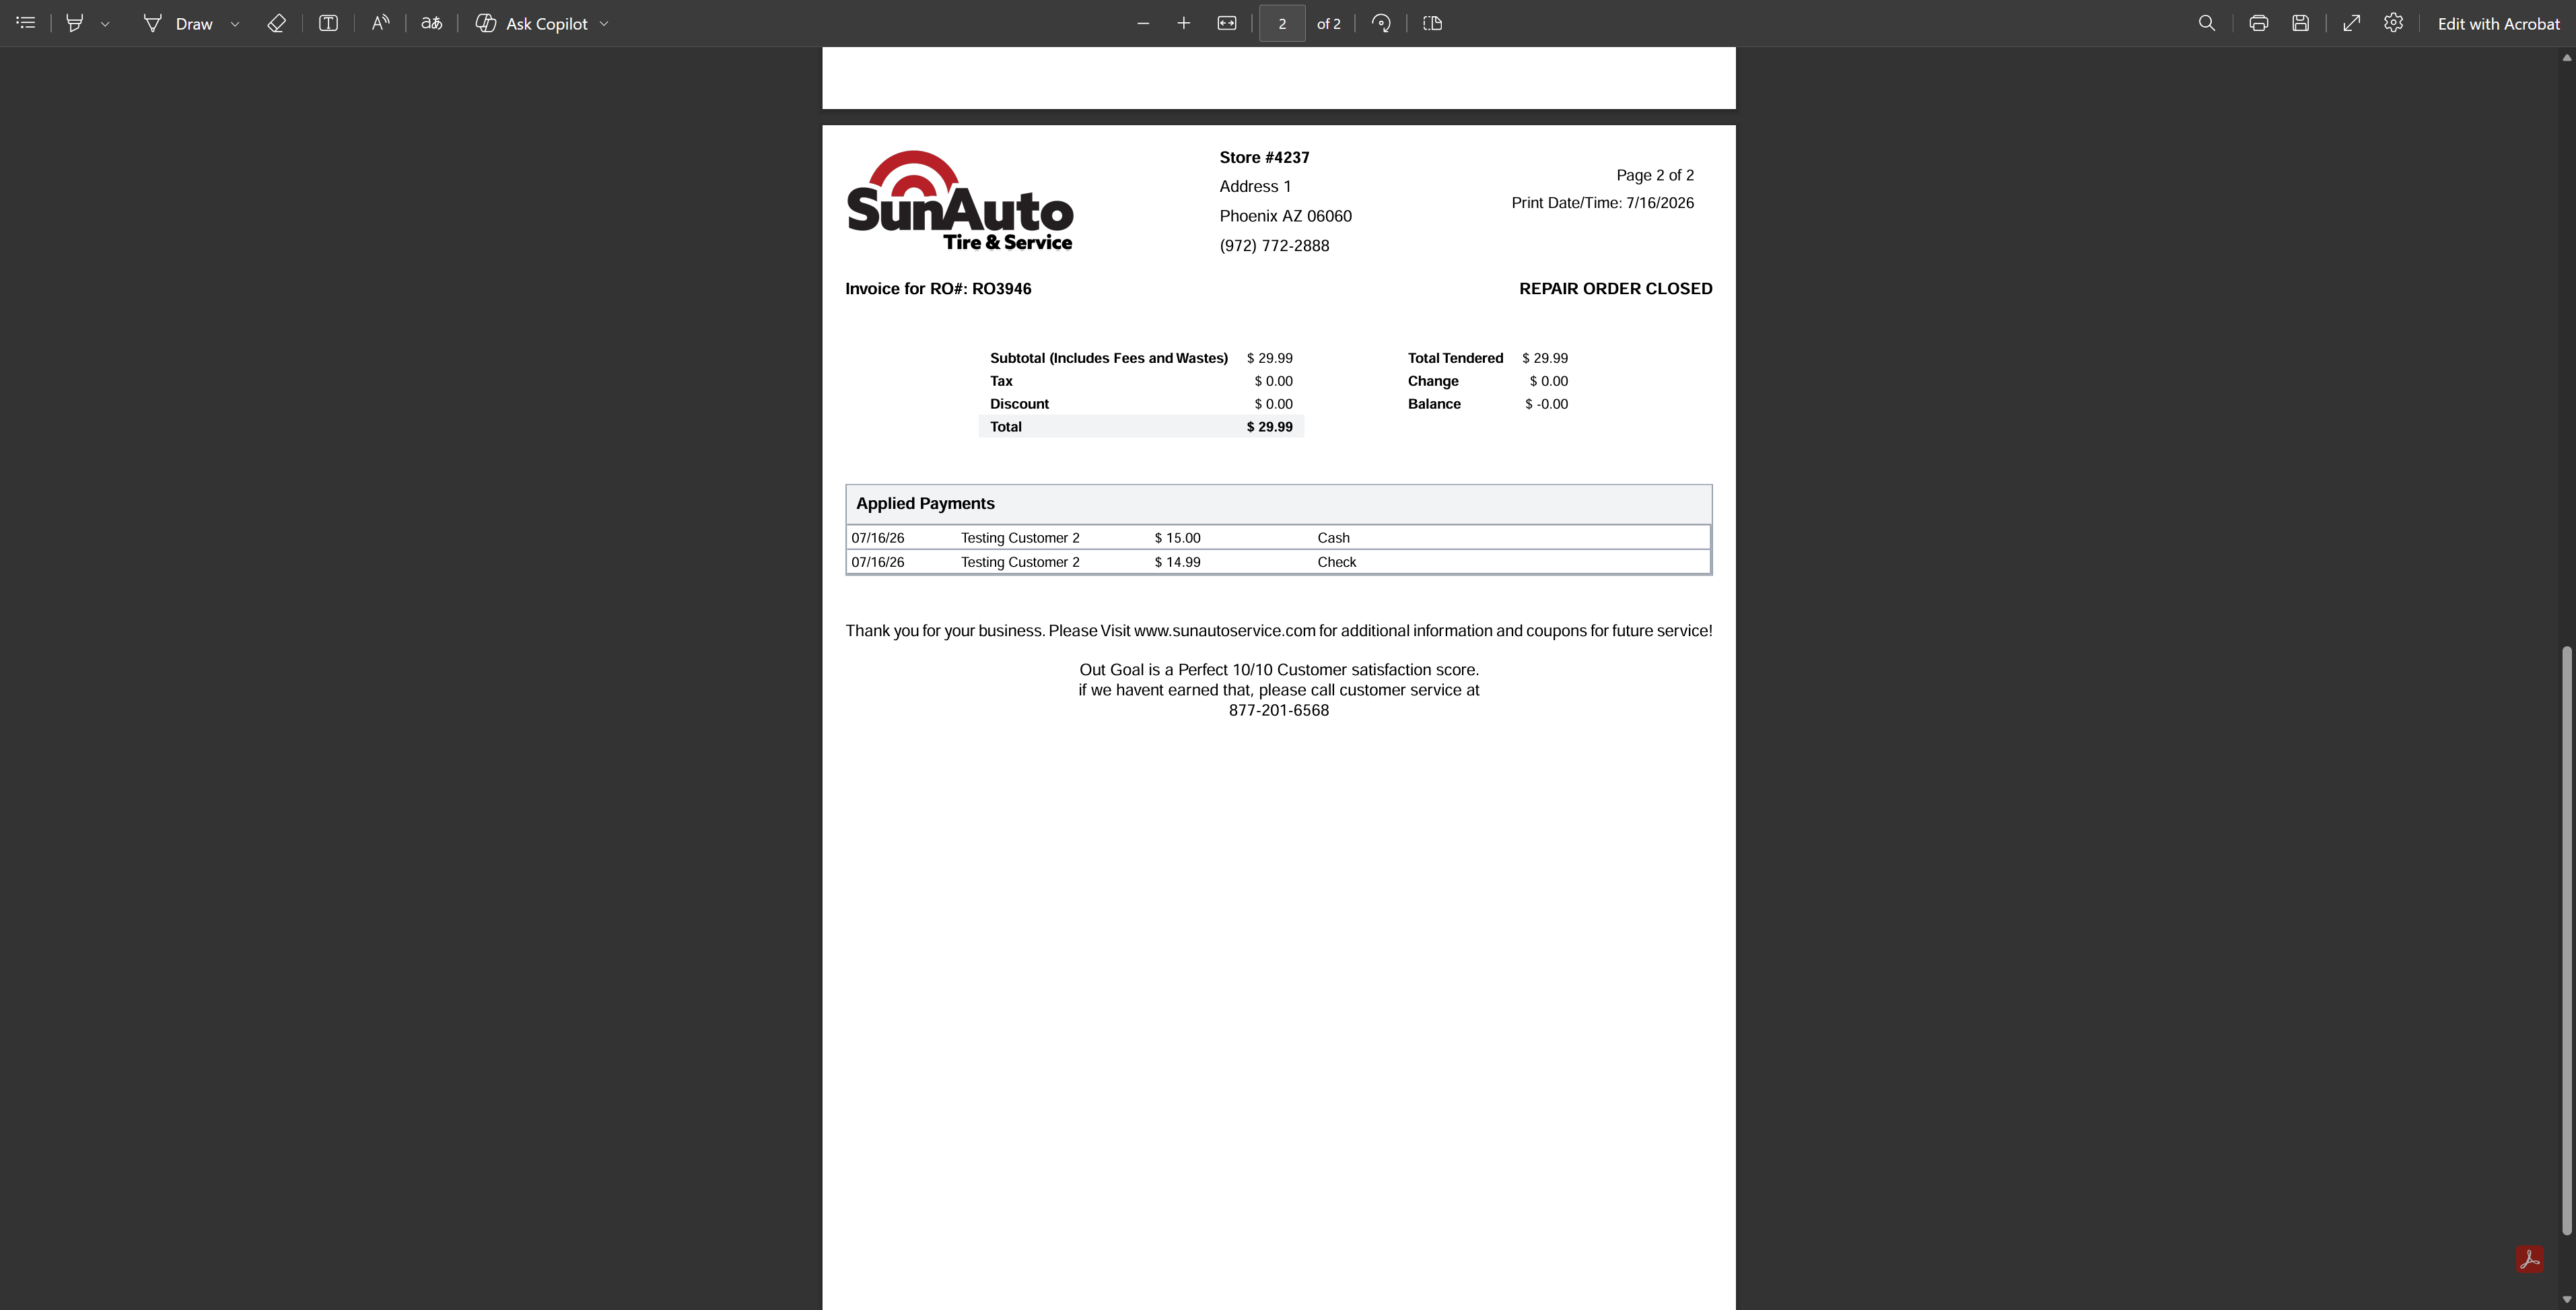
Totals & applied payments. The totals block lists Subtotal (Includes Fees and Wastes), Tax, Discount, Total, Total Tendered, Change, and Balance. An Applied Payments table lists every payment that went toward the RO — so if the customer paid part in cash and part by check, both payments appear there together covering the total.
 1
Subtotal (Includes Fees and Wastes), Tax, Discount, Total — the left totals column.
2
Total Tendered, Change, Balance — the right totals column; Balance reads zero once paid in full.
3
Applied Payments — every payment toward the RO; a cash and a check payment appear together here.
1
Subtotal (Includes Fees and Wastes), Tax, Discount, Total — the left totals column.
2
Total Tendered, Change, Balance — the right totals column; Balance reads zero once paid in full.
3
Applied Payments — every payment toward the RO; a cash and a check payment appear together here.
5. What "closed" means downstream
A closed RO is finalized — its totals flow into end-of-day reporting. Once closed, the RO isn't the place to make corrections; handle those through the Playbooks.
Related
- Payments — taking the final payment by cash or check.
- Adding Parts — putting parts on a Job.
- Adding Labor — putting labor operations on a Job.
- Declining and Transferring Jobs — moving declined or recommended work off the active RO.